Find the Githyanki Crèche
Spoiler warning: The following content contains unhidden spoilers. Read at your own risk. |
Find the Githyanki Crèche is a sub-quest of Act One's main quest, Find a Cure. It can be initiated as soon as Lae'zel is rescued during Free Lae'zel if she joins the party. For the majority of Act One, this quest is directly connected to Lae'zel's companion quest, The Githyanki Warrior.
Objectives[edit | edit source]
Objectives and journal entries may vary pending player decisions and outcomes.
- Lae'zel told us that the githyanki should be able to cure us, if we can find one of their crèches. Someone named Zorru should know more.
- We found Zorru. Lae'zel will want to speak with him.
- Lae'zel says that we can be cured at a Githyanki Crèche and hopes to find her kin nearby.
- Zorru is dead. We'll have to find another lead to the Githyanki Crèche.
- Zorru left the grove. We'll have to find another lead to the Githyanki Crèche.
- We spoke to a tiefling called Zorru. He wouldn't tell us anything about the githyanki he'd seen. We'll have to find them ourselves.
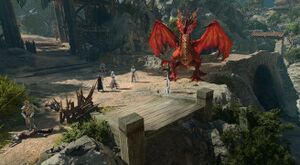
- We learned of a githyanki patrol to the northwest. They might be able to lead us to their crèche.
- We found the githyanki Zorru mentioned near the mountain pass. We should speak to them - they may know where we can find a Githyanki Crèche to cure our illithid infection.
- We found the githyanki patrol, but they weren't very cooperative. We still don't know where the crèche is - we'll need to find it ourselves.
- Lae'zel told us of a cure we can find at a Githyanki Crèche. She thinks one of the patrol will have a map. We should search the corpses.
- We defeated Sarth Baretha and her squadron - we should search her body for more information about the nearby crèche.
- We learned where the crèche is located. We should see if we can find answers there.
- The Githyanki Crèche is nestled somewhere within Rosymorn Monastery. We should take a look.
- We've reached the crèche. Lae'zel says there should be some kind of device capable of removing the parasite. We just need to find it.
- We've reached the crèche. Without Lae'zel's guidance, it may be harder to find the cure she mentioned.
- The guards told us to report to the Crèche Infirmary, where the doctor will inspect us.
- Vlaakith and Inquisitor W'wargaz tried to kill us. It might still be worth investigating the Crèche Infirmary for a way to remove our parasites.
- We found the Crèche Infirmary - we should speak to whoever runs it.
- The ghustil, this crèche's medical expert, may have a way to cure our illithid infection.
- Though Vlaakith and the Inquisitor tried to kill us, we should still speak to the ghustil. We may still be able to cleanse our illithid parasite.
- Ghustil Stornugoss, the doctor, said the zaith'isk can extract our parasites. However, it sounds dangerous.
- Ghustil Stornugoss, the doctor, is dead. There might still be a way to operate the githyanki purification device.
- We attempted to remove our parasites using the githyanki purification device, but it failed and almost killed us. Our parasites must be very unusual.
- We activated a self-destruct mechanism, which blew up the Githyanki Crèche. The githyanki purification device will undoubtedly have been destroyed along with it.
- There is no time to look for a cure in the Githyanki Crèche anymore. We must press on.
Walkthrough[edit | edit source]
As part of Free Lae'zel, Lae'zel is trapped in a cage and speaks telephatically with the party to let her out. If asked why they should do that, she states that she has a cure for the tadpole, but she will only share it if they set her free. Two tieflings, Nymessa and Damays discuss how their friend Zorru was nearly gutted by a squad of githyanki warriors. Assuming Lae'zel is with them, they intend to bring her back to the Druid Grove so that their leader can deal with her. The party can either kill them, or convince them to run away and let the party deal with Lae'zel.
Once Lae'zel is freed, she explains that the cure can be found at a githyanki crèche. They have a special device - a zaith'isk - which can cure those infected by mindflayer tadpoles. Hearing that there is githyanki activity in the area, Lae'zel suggests they track down Zorru and see what he knows.
Zorru can be found in The Hollow, near the tiefling's storehouse. If the party speaks to him with Lae'zel in the party, he is instantly terrified that she's come to kill him. Regardless of the choices made, Zorru reveals what he knows if Lae'zel is around, as he's too scared to disobey. One of his friends was gutted in front of him, near the Mountain Pass. One of Zorru's friends can be found at the Blighted Village, labeled simply as a Dead Tiefling (X:5, Y:366). She is in the same room as the ogres. Using Speak with Dead on her reveals that she too encountered githyanki in the mountains.
The Githyanki Patrol[edit | edit source]
This conversation is complex, with multiple variations depending on whether Voss speaks with Lae'zel, a gith origin, or any other character. Each variation requires a different number of ability checks to avoid hostilities. This page will focus on the path of least resistance, with or without Lae'zel.
Lae'zel Speaks with Voss[edit | edit source]
If Lae'zel is in the party, the encounter becomes much simpler.
- Nod to Lae'zel. Go ahead.
- I will be speaking on her behalf, gith.
Choose the first option to allow Lae'zel to speak, and Voss reveals the search for a githyanki artefact. He asks if Lae'zel has seen anything like that. Choose the ability check:
- [PERSUASION] Mouth a silent command to Lae'zel: 'play along'. (DC 10)
After the DC 10 check, another passive deception check happens in the background. If Voss determines that you are lying, he commands the patrol to attack.
If you succeed the check, Voss commands Lae'zel to go to the crèche and aid the search for the artefact before flying off.
Gith (or "Gith") Origin Speaks with Voss[edit | edit source]
If a githyanki origin, or a character disguised as gith using Disguise Self, Voss will ask what they are doing so far away from their crèche. If the character is accompanied by non-gith characters, he will question their company. Either way, the player must pass a ![]() DC 15 Deception check or
DC 15 Deception check or ![]() DC 15 Performance check in order to earn the gith captain's trust.
DC 15 Performance check in order to earn the gith captain's trust.
If successful, he will explain the search for the artefact and demand the player head to the crèche to join the hunt before flying away. Otherwise, the player must fight the patrol.
Non-Gith Origin Character Speaks with Voss[edit | edit source]
This is the most difficult path. If Lae'zel is not in the party, or the player insists on speaking on her behalf, Voss asks why he shouldn't run them through.
- [SLEIGHT OF HAND] Silently hold his stare and discreetly prepare to attack. (DC 15)
- [INSIGHT] You would've done so already if you didn't want something from me first. (DC 10)
- [INTIMIDATION] I just want passage - if I have to go through you, so be it. (DC 15)
- [PERSUASION] I don't know you. I pose no threat. (DC 15)
Succeed in any of the checks and Voss remains neutral. He reveals the search for the artefact. Choose one of these options:
- I'll help if I can.
- You'll need to start from the beginning - what is this weapon you're after?
Voss tells them to be silent while doing rapid hand gestures:
- [ARCANA] Silently interpret the meaning of the gestures. (DC 10)
Succeeding this check and choosing to resist the probing with another Wisdom check (DC 10) causes Voss to get frustrated at the uselessness of their thoughts. Otherwise, he learns they have a mind flayer tadpole and the githyanki become hostile.
- [PERSUASION] I could help if you let me live - search for this weapon perhaps. (DC 15)
- [PERSUASION] You ought to just leave. You've no right to decide my fate. (DC 15)
- [INTIMIDATION] Why are you hesitating, then? Try it, I dare you. (DC 15)
- [DETECT THOUGHTS] Read his thoughts.
A successful pass of any of these checks and Voss lets the party live. He tells them to go to the crèche - ahead, at the Mountain Pass. Otherwise, Voss becomes suspicious that the party is infected with tadpoles or carries the artefact, then he flies off on his dragon and orders the githyanki soldiers to kill them all. Sarth Baretha, Raider Chost, Raider Zastri, and Gish For'reth attack the party.
Accessing the Monastery[edit | edit source]
The Rosymorn Monastery is accessed from the Mountain Pass. Find the Cable Car Wheel (X:-47, Y:-74) and succeed in a Strength check (DC 15) to summon the cable car. Climb on the cable car and use the wheel to move towards the Monastery. Follow the path east until a cutscene triggers where a group of githyanki warriors shoot down some cultists. Unfortunately, the Rosymorn Monastery Doors are locked and magically enchanted, but there are broken windows that can be climbed through (X:64, Y:31) just west of the doors. Once inside, there are a number of drunk Kobolds who can be snuck past or killed. Move north to the giant crack in the wall. From here, jump up the rocks to get higher up on the Monastery.
The Githyanki Crèche[edit | edit source]
From upper floor, move north up the hall, then jump across the gap to the east. Move south, then east to find a set of crumbling stairs. Jump past the gaps to follow the stairs down. Once the stairs have been descended, move north and a barricade is on the western wall. Destroy it and walk through. Move north through the oak door, then keep moving west past the statue of Lathander. (Note: There is a lever on the wall (X;78, Y:49) that opens the monastery doors, which can make reentering the monastery easier)
After moving west, follow the stairs to north to reach the Monastery Basement (X:74, Y:80) where Crèche Y'llek resides. The githyanki are suspicious to outsiders - Lae'zel can smooth the way without any checks if she's in the party, or the party can gain access by persuading, intimidating, or deceiving the guards.
The Infirmary[edit | edit source]
The infirmary (X:1299, Y:-809) is on the southwestern end of the crèche. Ghustil Stornugoss is in charge of Zaith'isk purification and research on the illithids. Speak to her and reveal that the party is infected with tadpoles to initiate the purification.
The party can Investigate the device closely (DC 15), learning that it's a synthesis of illithid anatomy and metal alloys. It hums with psionic energy hinting at paths into unknown minds and unseen planes. Lae'zel insists on going first. The player can let her, insist that they go first because Lae'zel owes her success to them, or tell her to step aside without elaboration. The first two choices will net approval from Lae'zel, while the third option will turn her immediately hostile.
Lae'zel Sits in the Zaith'isk[edit | edit source]
If the party tells Lae'zel to go ahead, she eagerly sits on the zaith'isk.
- [PERSUASION] Get out of there, Lae'zel. You won't survive this anguish. (DC 30)
- [WISDOM] Call on your parasite. Show Lae'zel what she stands to lose. (DC 30)
- [GITHYANKI][HISTORY] Extract yourself. Mother Gith would not wish you to suffer. (DC 30)
- Plead with the doctor. Lae'zel is in great pain.
- Endure, Lae'zel. the cure is worth the torment.
- Wait and Watch.
Telling Lae'zel to endure nets approval with her. She continues to suffer while the devices causes her great agony. Successfully convincing her to leave the zaith'isk nets approval with Lae'zel, Astarion, Gale, and Shadowheart.
- [WISDOM] Seek answers within the zaith'isk. What is this vision? (DC 21)
- [DECEPTION] You must listen! the device is changing you. You are becoming illithid. (DC 30)
- Keep focused, Lae'zel. The cure is close.
- Wait and Watch.
Choosing the first option has the player learn that the zaith'isk is not a device for saving victims of mind flayers. Rather, it's a device that extracts the memories of the infected and then kills them. The device will kill Lae'zel if nothing is done. If the second option is chosen, then Lae'zel is deceived into leaving the device.
- [DECEPTION] Your tadpole is changing, growing. You have to resist the machine! (DC 21)
- [WISDOM] Focus your mind. Try to overload the device. (DC 30)
- [CONSTITUTION] Pursue the visions you saw. See where they lead.
- [ARCANA] Draw on the zaith'isk's power, take it as your own. (DC 30)
- Embrace the pain, Lae'zel. Be pure.
- Wait and Watch.
Origin Character Sits in the Zaith'isk[edit | edit source]
If the player sits on the zaith'isk, the device pulses and they feel utter agony, triggering an Intelligence Saving Throw (DC 12) to seek the tadpole. Unfortunately, the parasite only doubles down and burrows further, triggering a Wisdom Saving Throw (DC 15). The Netherese magic within the tadpoles causes it to fight back again:
- [INTELLIGENCE] Focus on this ancient magic. Feed it with your own. (DC 18)
- [CONSTITUTION] Keep going. Complete the extraction. (DC 18)
Additionally, Warlocks, Clerics, Wizards, Druids, Monks, Bards, Paladins, Sorcerers, and Barbarians all have unique saving throws (DC 18).
Even if all Saving Throws are succeeded, the Zaith'isk simply explodes. Stornugoss despairs at the loss of her life's work. If she thinks the parasite is still intact, she locks the party in the room and any attempt to escape causes the crèche to become hostile. If the party deceives her and uses a performance to throw her off (DC 15), then she simply tells them to leave.
If the crèche is hostile, the party must fight their way to the infirmary. The ghustil also fights the party, meaning she isn't available to guide the party to using the zhaith'isk. Despite this, the scene plays out nearly identically to if she was there, just without some of her comments or the need to deceive her at the end.
The Kith'rak[edit | edit source]
If Kith'rak Therezzyn has not been spoken to as part of Discover the Artefact's Secrets, then Lae'zel demands the party speak to her. She believes that the ghustil is corrupt and tampered with the zaith'isk. The party can go to her and ask that they be seen by the Inquisitor, Ch'r'ai W'wargaz, as they believe someone in the crèche is a traitor. Regardless of what the party says, she ignores it and says she knows they have the artefact. She demands they show it to her. If the party refuses, she becomes hostile along with the other githyanki in the room. Otherwise, she locks the door and says they must speak to the Inquisitor.
Consequences[edit | edit source]
Using the zaith'isk can cause permanent debuffs to the character who entered it. Each failed saving throw results in a -2 to a stat. The first roll is wisdom, the second is intelligence, and the third is constitution. If Lae'zel goes into the zaith'isk, she also risks permanent debuffs. However, choosing to consume tadpoles reduces the effect of the debuff.
A permanent buff known as Awakened can be gained by choosing "Draw on the zaith'isk's power, take it as your own" or succeeding all three saving throws if the origin character entered the zaith'isk.
Companion approval[edit | edit source]
The Githyanki patrol on The Risen Road:
Outside Crèche Y'llek:
In the infirmary of Crèche Y'llek:
- Allow Lae'zel to use the Zaith'isk
 +10
+10 - Insist that you go first because Lae'zel owes her success to you
 +3 +1 +1 +1 +1
 - Tell Lae'zel to endure
 +1
+1 - Convince Lae'zel to leave the Zaith'isk
 +1
+1  +1
+1  +1
+1 +1
+1
Notes[edit | edit source]
- The githyanki patrol encounter can be avoided entirely by taking the Mountain Pass route by the Goblin Camp. This avoids the risk that the githyanki become hostile with the party, and they can proceed ahead to the crèche.
- If the party destroyed the crèche as part of Find the Blood of Lathander before visiting the infirmary, then the zaith'isk cannot be used.
- The infirmary holds three different Mind Flayer Parasite Specimens that can be taken.
