Moonrise Towers
More actions
| Shadow-Cursed Lands | ||||
| Reithwin Town | ||||
| ↑ | ||||
| Moonrise Towers | ||||
Overview edit
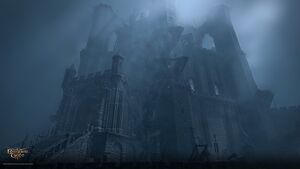
Moonrise Towers has always been the main seat of the Thorm family and its head, Ketheric Thorm. Under his lead, it has been a stronghold of Selûne, then of Shar, and (as of the game's events) as the base of operations for the Cult of the Absolute. It is one of the few locations in the Shadow-Cursed Lands unaffected by the Shadow Curse, the others being Last Light Inn and the Sharran Sanctuary.
Main floor edit
Entrance edit
The entrance to the towers is at the end of the bridge from Reithwin Town. At the far end of the bridge, the Moonrise Towers Waypoint is located within the Shadow-Cursed area. There are no other Waypoints inside the stronghold proper. Upon approaching the bridge, the Dream Guardian cheers on the party, confirming that they are close to the heart of the Absolute.
Immediately after the bridge lies a small tower on the eastern side. It has a locked door which requires a DC 14 Sleight of Hand check to lockpick or can be opened by the Moonrise Guard's Key, which is carried by most guards in Moonrise Towers and opens most doors in Moonrise. Inside the room is a wooden crate containing 3 sets of Thieves' Tools.
The stairs to the entrance are guarded by Zealot Malik and Adept Merim. Upon visiting the Moonrise for the first time, Malik probes the player character's mind through his own tadpole, recognizing them as a True Soul. If the player character is the Dark Urge, Malik welcomes them "back" (but then calls it his own mistake). Unless choosing to fight against the guards, they invite the party to proceed inside, advising them to report to Z'rell.
Provoking a fight with Malik and Merim earns +1 and +1 approval. Telling them that the party infiltrated the Harpers' hideout in the shadows gives -1 -1 -1; this is only available if the party have already been to the Last Light Inn and obtained Isobel's blessing.
Several Ghouls are stumbling around the entrance stairs. Unlike all other monsters of this kind, those at Moonrise Towers can be spoken to and express their devotion to the Absolute (a random party member may comment on it). To the east of the stairs, a thick bunch of Roots can be used to climb to the first floor of Moonrise Towers, bypassing the Main floor altogether.
Lobby edit

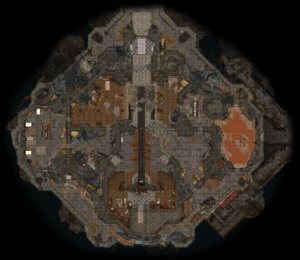
Between the entrance and the door to the throne room[1], there is a vast lobby connected to a small mess hall, a kitchen, and the sanguine laboratory to the east, and dormitories and an antechamber with stairs leading to the Moonrise Towers Prison to the west. Both wings have doors to the rear balconies, partly destroyed, but connected by wooden footways and roots, allowing the party to explore the Main floor in a circle. Two Scrying Eyes fly around the lobby and the throne room (see below), passing through the doors. The lobby is guarded by Zealot Brinn, Adept Dorikel and Adept Furek.
In the western part of the lobby, there are several Absolutist pilgrims, Farimorn, Iong, Nalira, and Taima, along with Acolyte Belub. The party can tell Belub to get rid of the four pilgrims, who he then orders to scout the perimeter of the war camp. The pilgrims do not survive the shadows and can later be found again as shadow-cursed zombies outside the House of Healing Morgue at X: 235 Y: 12.
Two traders can also be found on the western side of the room: Roah Moonglow and Lann Tarv.
Lann Tarv is a bugbear merchant (or "bugbear quartermaster" as Z'rell calls him). Idling the time, he throws cleavers at a training dummy. He calls the party members "weaklings" and challenges whoever speaks to him to prove they are worthy. If convinced through dialogue options with skill checks, Lann Tarv provides a discount while trading.
He sells a number of valuable items, including the Halberd of Vigilance, Gloves of The Duellist, Fistbreaker Helm, and Sentinel Shield. Also, additional stock is potentially unlockable after convincing Z'rell to help the party.
If Karlach is in the party, the bugbear recognizes her immediately. He offers her three Soul Coins, left for her by Florenta the Garroter – a cambion and Karlach's acquaintance from Avernus – on the condition that Karlach first listens to the stories of the souls bound in the coins. If the player character agrees, Lann Tarv recites the stories one by one, then surrenders the coins as well as a Sulphurous Note. Ultimately refusing to take the coins or choosing to trade instead results in -5 approval.
Proving the party's worth to Lann Tarv through any available dialogue option earns the following inspirations:
- Notched Armour ( Soldier background)
- Uncommon Recognition ( Folk Hero background)
Roah Moonglow, a halfling merchant, can be found deeper in the western part of the lobby. Unlike Lann Tarv, she greets the player character warmly (if a bit ironically). The dialogue with her may vary depending on whether the party have already met her in the Goblin Camp and whether they know that Roah belongs to the Zhentarim. If the party are unaware of the latter, any character might uncover it by passing a DC 10 History check check when speaking to Roah. Regardless of the dialogue chosen, Roah turns the talk to trading with her.
Roah's stock in Moonrise differs from the one she might have had in the Goblin Camp. This time, she has several unique items to trade in addition to her previous assortment, like Ne'er Misser, Drakethroat Glaive, and Ring of Spiteful Thunder. Rogue characters can ask her for a discount through a special gesture.
Agreeing to trade with Roah Moonglow grants the War Profiteer inspiration for characters with the Criminal background.
Dormitories edit
In the far western corner of the main floor is a dormitory, occupied by Zealot Iogar, Acolyte Kimmeral and an ogre named Mig. If spoken to, Mig claims to hear "meat-things" moving in the walls (upon hearing this, a point called "Suspicious sounds" is marked on the map). If killed, she may be looted for Argument Solver. This room also acts as an exit to the southern exterior of the tower.
Just past the dormitory's exterior door is a cracked wall at X: -183 Y: -206 containing a wooden chest. It is marked on the map if the party have taken on the side quest Investigate the Selûnite Resistance and found a parchment in the basement of the Mason's Guild.
A small antechamber adjacent to the dormitories has a staircase leading down to the Moonrise Towers Prison, with bloody traces on the floor marking the way unmistakably.
Mess hall and kitchen edit

The eastern part of the lobby is empty, save for three goblins: Orik, Weneg, and Wim. Weneg might react to the party suspiciously, depending on their actions at the Emerald Grove, while Wim worries about some of his kin who were brought into the throne room and still have not come back. Occasionally, he approaches the closed Absolute's Door and tries to eavesdrop on what is happening inside.
At X: -139 Y: -162, a ladder can be used to access the rafters (see the section below), and nearby is a door leading to the mess hall. The mess hall can provide the party with some free Camp Supplies. The wall breach across the door is curtained by a mucal mesh similar to the fleshy stuff at the Nautiloid wreckage in Act One. A successful DC 16 Perception check draws the player character's attention to it. If not added earlier, the check also adds a "Suspicious sounds" marker to the map.
At the far end of the mess hall, another door leads to the kitchen. There, the party can find Linsella, a True Soul, training Barnabus the gnoll with her mental influence. Two more gnolls, Tomelia and Timothy, wait their turn in the far corner of the kitchen.
Linsella can be spoken with, where she boasts her ability to control Barnabus. However, her mental leash wavers while she is distracted by the conversation, which gives the player three options: help Linsella reassert control, sever the connection (requires a DC 16 Wisdom check), or do nothing. If the gnoll is freed, he kills Linsella. He must then be convinced not to attack the party through an ability check, with various options depending on the speaking character's class; the Dark Urge can pacify the gnoll automatically. If the player character chooses to do nothing, Barnabus dies from mental strain.
Choosing to sever Linsella's control earns +1 +1 +1 +1 and +1 approval. Helping Linsella preserve control gives -1 -1 +1.
Resolving the situation may grant the following inspirations:
- Danse Macabre ( Entertainer background)
- Gone Feral ( Urchin background)
- No Strings to Hold Them Back ( Folk Hero background)
- Pied Piper ( Charlatan background) – unlike the others, this one is earned merely for influencing the connection, regardless of the result
- Who Let the Gnolls Out ( Haunted One background)
Reinforcing Linsella's mental efforts to influence Barnabus is considered an Oath-breaking action for Paladin characters following the Oath of Vengeance.
If Linsella dies, her body can be looted for a Mind Flayer Parasite Specimen. If the gnolls were freed and successfully pacified, they join the party's side in the Harpers' assault on Moonrise Towers at the end of Act Two. The kitchen also has numerous Camp Supplies, but they are marked red until the end of Act 2.
Sanguine laboratory edit
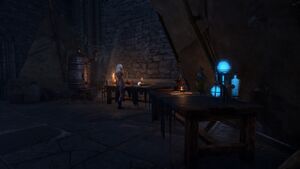
Near the door between the mess hall and the kitchen is an entrance to a sanguine laboratory where the drow alchemist Araj Oblodra is performing experiments on blood. Pilgrim Sul rummages around in sacks and barrels.
Araj Oblodra offers the player character a unique potion based on a sample of their own blood; its type and effects depend on the race (for Dragonborn, on the particular subrace) of the character who interacts with her. If Astarion is in the party, she pays extra attention to him [2], eventually turning the conversation to his vampiric nature. She asks Astarion to bite her in exchange for a unique reward, but he expresses great reluctance to do so. The player character can take his side or have him appease the drow. Various dialogue options within this conversation grant approval/disapproval from companions, particularly Astarion himself.
Donating blood to Araj awards the Blood, Sweat, and the Other Thing inspiration to all characters with the Guild Artisan background.
After resolving both requests, Araj Oblodra can be interacted with as a regular trader. She sells several valuable items, including the Circlet of Hunting, Hat of Storm Scion's Power and Ring of Free Action.
Chests and sacks around her small study contain a fair share of various alchemical ingredients, but are red-outlined to pick up while the drow is present. However, closer to the end of Act Two, Araj Oblodra flees Moonrise, leaving all her belongings behind, including a Potion of Angelic Reprieve on her work table.
Behind the sanguine laboratory, on the outer balcony at X: -133 Y: -229, the party can meet Steelclaw the cat, either sleeping or playing with a dead Mind Flayer Tadpole. She can be spoken to via Speak with Animals and fancies herself a ruthless predator keen on hunting the tadpoles.
Talking to her grants the following inspirations:
- Mutual Respect ( Outlander background)
- Alley Cats ( Urchin background – granted only if the party have already met His Majesty in Last Light Inn.
If the player character is the Dark Urge, Steelclaw recognizes them with disgust. Trying to search through their memories for anything about this animal results in their Urge taking over, and the player character kills the cat.
Murdering Steelclaw while playing as the Dark Urge is considered an Oath-breaking action for Paladin characters of any Oath.
Rafters edit
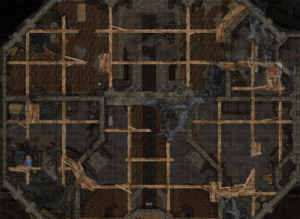
Just to the east of the ladder in the lobby is a Cracked Wall, where the source of the "suspicious sounds" noted by Mig might be uncovered. A DC 14 Arcana check tells the player character that the essence inside the walls is close to the one felt on the Nautiloid.
If interacted with, the interacting party member can reach inside, which prompts a series of skill checks. If multiple checks are failed or if choosing to submit, the party members are pulled into the wall and transported to the Oubliette. Failing any check gives the interacting party member the Dislocated Shoulder condition.
On the western side of the rafters (X: -179 Y: -198), above the room leading to the prison, are some roots which can be climbed to access Isobel's room on the first floor.
Throne room edit

The throne room occupies the central part of the Main floor.
Upon the party's first visit to the stronghold, they see Ketheric Thorm judging his subordinates from the Goblin Camp, accompanied by Disciple Z'rell and guarded by several devotees of the Absolute:
If Minthara survives in Act One (regardless of the fate of the Emerald Grove and the Goblin Camp), she is the main person accused of failure. If she died, the main subjects are three goblins; the one speaking on their behalf might be Sazza or Fezzerk if either survived, or Drenn replacing them otherwise.
On approaching, a cutscene involving Ketheric, the accused, and Z'rell is triggered.
In the Dark Urge's case, Ketheric first greets the player character cryptically, causing yet another attempt to remember their true self (but without any flare-ups of their Urge this time), and then delivers his judgment.
Otherwise, Ketheric asks the player character for their opinion on the matter. Regardless of their answer, he condemns Minthara (if present) and the goblins to death, and then kills Drenn with his bare hands after she attacks him. Afterwards, he commands Z'rell to deal with the remaining goblins before suggesting she have the player character do it, and then he leaves the scene. The conversation continues between all participants left, and the player character is presented with dialogue options to kill or spare the goblins, with variants depending on the character's class; the Dark Urge has several options if they choose to kill.
Both decisions might find approval and disapproval from various companions. Also, depending on the outcome, the following inspirations can be earned:
- A Velvet Glove ( Noble background) – if the goblins are spared
- An Iron Fist ( Noble background) – if the goblins are killed by the party
- Newly Downtrodden ( Urchin background) – if the goblins are spared
- Too Easy ( Haunted One background) – if the goblins are killed by the party
If Sazza is one of the judged goblins, setting her free after the trial earns the following achievement:
- She Cannot Be Caged!
- Rescue Sazza from the Emerald Grove, Goblin Camp and Moonrise Towers in one playthrough.
Killing the goblins through Illithid mind-control is considered an Oath-breaking action for Paladin characters following the Oath of Vengeance and Oath of the Crown.
The door on the east side of the throne room leads out to the sanguine laboratory, and the west door leads to the prison antechamber. Behind the throne is a double staircase leading up to the first floor of Moonrise Towers.
First floor edit
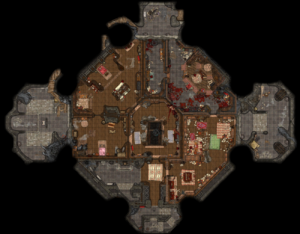
The first floor of Moonrise Towers begins with a small corridor. An archway to the east leads to a large ornate door, and a door to the west leads to the library. A smaller door at the end of the corridor leads to the hall between the personal chambers of Ketheric, his necromancer Balthazar, and Isobel. This door is locked and off-limits to the party (it remains red-outlined even after defeating Ketheric). The hall is patrolled by Zealot Klen and a Scrying Eye.
The ornate door leads up to the roof and is guarded by Radija, her necromites, and Glourik the ogre. The party can get through this door before assaulting Moonrise Towers by helping Balthazar retrieve Ketheric's relic and then resolving Isobel's fate [3]. The party can also simply sneak past the guards to access the rooftop early.
Upon reaching the first floor for the first time, after Ketheric's trial, Z'rell also stands here talking to Radija. The dialogue with her starts automatically when approaching her, and the half-orc probes the player character's mind twice: first to find out the goblins' fate, then to measure their devotion to the Absolute. She also boasts the power acquired from the Absolute and might kill Glourik if the player character asks her to demonstrate this power.
If the player character chose to spare the goblins, Z'rell demands an explanation. Successfully vindicating themselves requires passing a DC 16 Deception or Persuasion check and earns +1 +1 +1.
When searching the player character's mind for proof of devotion, Z'rell can be distracted by using other emotions. The particular options depend on the character's class and whether they are currently on a romance track with any companions. Appealing to romantic feelings towards any of them brings minor approval from the companion in question, if they are in the party.
Z'rell orders the party to aid the general's necromancer, Balthazar, in retrieving a "relic" crucial for Ketheric's plans. To help the party, she tells the player character to take a Moonlantern from Balthazar's chambers and gives them a key to the room. Succeeding a passive DC 14 Insight check throughout the dialogue [4] allows the party to convince Z'rell ( DC 18 Persuasion check) to grant access to her secret stash of goods while trading with Lann Tarv. Upon ending the conversation, she moves to the study in front of Balthazar's room.
While talking with Z'rell, the party can gain the following inspirations:
- Clear Conscience ( Charlatan background) – for deceiving Z'rell that the goblins suffered
- Know thy Clientele ( Charlatan background) – for goading her into killing Glourik
- No Peeking! ( Urchin background) – for blocking out Z'rell from reading the player character's intentions.
After receiving the key to Balthazar's chambers, the party may search his room freely despite Z'rell's warning. Neither the guards nor the Scrying Eye normally enter it. The room can also be reached by a system of wooden footways and roots clinging to the tower's outside walls, leading up to the balcony behind the necromancer's chambers. There are a few opportunities to gain inspiration for exploring the off-limits parts of the first floor:
- Enter Nostalgia ( Criminal background) – for trespassing into both Ketheric's and Isobel's rooms
- Never Liked Stairs ( Outlander background) – for entering any of the three restricted rooms from the outside
Z'rell's study edit
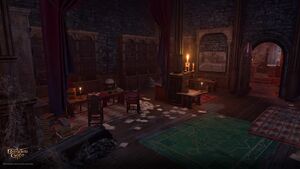
The party can freely explore this area. After the player character reports to Z'rell about their judgment passed on the goblins, she returns to her study and remains seated there until Moonrise Towers is assaulted (or until retrieving the Nightsong for Ketheric). On another desk nearby, an undelivered Missive from Ketheric can be found. The door across from Z'rell's desk leads to a balcony guarded by Zealot Bennel and Acolyte Daine. A Heavy Chest on the balcony contains some gold and valuables. If Glourik is not killed by Z'rell through the earlier dialogue, she patrols this part of the first floor between the Ornate door and the entrance to Balthazar's room.
Balthazar's chambers edit

Balthazar's room occupies the northeastern corner of the floor. It would have much resembled a library, if not for the number of corpses and gory remains littering the corners and hanging from the ceiling.
The central part of the room is a dais with several desks, where the party can take the promised functional Moonlantern. They can also find the Derivation Cloak in a locked Heavy Chest nearby ( DC 14 Sleight of Hand check to lockpick).
In the bookcase near the room entrance, the party can find a Clasped Book, which sheds some light on the story of the Dark Urge, and Orpheus, Prince of the Comet, Part Three: Resurrection – the third and last part of the githyanki legend.
Near a torture rack is a book case with several "Protruding Books", spotted with a DC 10 Perception check. Among the rows of regular books, several rare and very rare scrolls like Cloudkill or Blight might be found. There are also four labelled shelves, all of which are trapped except for the top-right one ("Musty Tomes"). The other three trigger the following traps:
- "Galvanic Interrogations" triggers the two gargoyle heads above the bookcase, which turn the two corpses on the floor into zombies.
- "Conventional Medicine" activates two spike traps from the floor in front of the bookcase.
- "Poisons and Venoms" fills the room with a poison cloud, closing and locking the doors until it dissipates.
Hints on which labels activate traps can be found in the books Balthazar Personal Notes: 2 and Attention Acolytes, which can be picked up around the room.
Interacting with the "Musty Tomes" row allows access to an Ancient Altar next to the shelves. The altar is interactive, allowing insertion of certain items. Ostensibly, a Heart is meant to be placed in the altar, of which several lie around the room. However, various other body part items found throughout the game also suffice, including the heads of Nere and Karlach, as well as the hand of Gale.
Successfully inserting a body part into the altar unlocks Balthazar's secret room beyond the bookcase. Inside, the player character may find a Coldbrim Hat in a locked Opulent Chest ( DC 14 Sleight of Hand check to lockpick), a goblet with dead mind flayer tadpoles, and a book with the necromancer's research notes. From the book, the party may discover that the long-searched-for "Nightsong" is actually the very relic sought by Ketheric, for it is the source of his invulnerability.
There is also a small work table covered in dead pixies and broken Moonlanterns from Balthazar's experiments. If Gale is in the party, he can use the ritual circle to create a Shadow Lantern or destroy it and gain Mystra's Benevolence, which lasts until the next long rest.
Unlocking Balthazar's secret study may grant the following inspirations for the Sage background:
- A Little Too Familiar with the Grotesque... – for solving Balthazar's secret study puzzle without mistakes
- Secrets of the Necromancer – for solving Balthazar's secret study puzzle with mistakes[5]
The metal door at the far end of the room is locked and requires a DC 30 Sleight of Hand check to lockpick, but can be opened with a lever just beside it. Two Traveller's Chests nearby contain some alchemical ingredients. The door leads onto a small balcony, where, in a makeshift pyre, lies a Charred Prayer Book. It contains prayers addressed to Shar and was seemingly discarded by Ketheric Thorm upon devoting himself to another god. If the party manage to get up to the wooden perch at X: -159 Y: -153, they can, through a series of climbs and jumps, reach an upper walkway of the tower. There, three Winged Horrors wait, babbling about their fear before Steelclaw the cat. The party can pacify them via dialogue (which is started automatically upon approaching the creatures and requires a DC 18 Persuasion or Intimidation check) or fight them[6]. Afterwards, the party can continue to a small balcony, where an Opulent Chest at X: -149 Y: -224 contains several rare alchemical ingredients.
Isobel's room edit
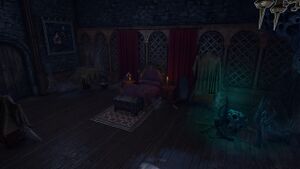
The room seems to have belonged to her sometime in the past[7] and is accessible either through the first floor's patrolled centre hall, or from Ketheric's neighbouring chambers, or by climbing up the roots from the rafters above the Main floor at X: -179 Y: -198. Inside the chests and cabinets are several items related to Selûne: a Selûnite Robe, a Selûnite Brooch, a Crescent Moon Earring, and a Selûnite Amulet. At the far wall stands a bust of Melodia Thorm, Ketheric's deceased wife and Isobel's mother.
The chest at the foot of the bed is a Mimic, which can be spotted with a DC 20 Perception check. It drops the Spineshudder Amulet and also a farewell letter from Melodia Thorm.
The balcony from Isobel's room features a stone throne in the centre, adorned with the symbol of the Absolute. To the north of it is a Heavy chest with Thieves' Tools, some gold, and some valuables.
Ketheric's chambers edit
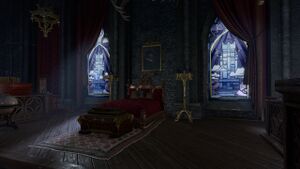
This room can also be entered in several ways: through the first floor's patrolled centre hall, through Isobel's room ( DC 14 Sleight of Hand check to lockpick the door), or through a metal door on the balcony. The balcony is accessible either from Balthazar's room or by using vines and wooden footways from outside; the balcony door requires a DC 30 Sleight of Hand check to lockpick.
Squire, Ketheric's undead warhound, is guarding this room. Once spotted, a dialogue with her begins. The player character can pass one of various ability checks to have Squire stand down; among them, Scratch's Ball can be used. If spoken to via Speak with Animals, Squire can tell the player character some facts about her master's past. If having received Isobel's blessing in the Last Light Inn, Squire recognizes it immediately, calling it "a scent of Selûnite magic", adding that her master smelled the same when she was alive, but now the tower has a different, wrong odour.
Once placated, Squire allows the party to explore and loot the room freely, not paying any attention to lockpicking the red-outlined doors or even fighting the Mimic in the adjacent room. Speaking to her again using Speak with Animals gives the option to pet her, which grants +1 +1 +1 +1 and +1 approval.
There are several items of interest within Ketheric's room. Beneath loose planks near the bed (visible with a DC 15 Perception check) is the book Elder Brain Domination, which reveals that Ketheric planned to eventually take sole control of the Cult of the Absolute. This is also the first proof of Gortash's involvement in the cult's rise available to the party and the first mention of the illithid Elder Brain as the source of the cult's deific power.
In the Opulent Chest at the foot of the bed ( DC 14 Sleight of Hand check to lockpick), the player character can find the Cloak of Elemental Absorption and Letter to Ketheric (all companions comment on reading the letter). Taking and reading the letter is advised, as it can help deal with Ketheric during both battles with him.
In the western corner of the room, there is a Myrkulite ritual circle. On the table nearby lies a scroll titled Apostle Diary. A DC 15 Religion check is required to decipher its meaning. In a wooden desk nearby, a book, Attracting Drow Exiles, can be found, shedding light on how Minthara was lured into serving the cult. The party can also find a missive from Gortash concerning the search for the Astral Prism, and an Unsent Letter from Ketheric to Balthazar.
Unlocking sorrowful facts of Ketheric Thorm's past grants the following inspirational events:
- Ketheric's Loss ( Noble background) – granted only if the party have also read the plaque on Isobel's tomb in the Thorm Mausoleum
- To Have Loved and Lost ( Sage background) – upon reading Melodia's letter
Moonrise Towers Prison edit
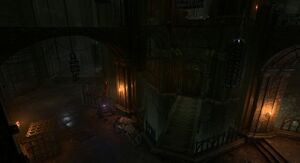
The prison can be accessed from inside the towers, as well as from outside, from the Docks (see below). Both ways lead to a large square antechamber with open pathways on each side: one leading to Heavy Oak Doors to the Docks, one to the torture room, and the last to the prison proper. At the bottom the stairs is guarded by Adept Ghulen.
If Minthara survived in Act One and was condemned to death by Ketheric Thorm, the party can find her in the torture room with questioners Jasin and Sumera, erasing her mind. Regardless of whether the execution takes place or not, the torture room can be looted for several Uncommon scrolls.
Heavy Oak Doors leading to the Docks is guarded by Zealot Soreni and Zealot Zira. If the player character chooses to save Minthara, they must find a way to bypass these guards or to use any of check-based options to placate them or Ghulen (depending on who spots the party first).
From inside the Moonrise Towers, the prison can be accessed following the stairs down from a room on the southwestern side of the main floor. Several imprisoned tiefling refugees and deep gnomes can be found in its cells, guarded by The Warden, Adept Keris and Zealot Nadi. Also, two Scrying Eyes constantly patrol the main corridor of the prison.
The prison has five cells and an inner tower (the Warden's office) in the centre. Behind the fifth cell there is a rocky cliff that leads to a vast cave behind the prison proper, with a speleal opening to the river where a chained boat waits. A side tunnel starting at X: 560 Y: -603 can be used to descend into the Oubliette (or to come up out of it).
Exploring the Moonrise Towers Prison and its adjancies, as well as fulfilling the quests related to this location may grant the following inspirations:
- Exploring the prison and interacting/fighting with the prison guards:
- A Bone To Pick ( Soldier background)
- Can't Bribe 'Em All ( Noble background)
- Delving into the Deep ( Outlander background)
- Not to Worry, I Have a Permit ( Charlatan background)
- Will Not Be Forgotten ( Urchin background)
- Dealing with tortured Minthara:
- Nobleborn as Below, so Above ( Noble background)
- Soulful Lobotomy ( Haunted One background)
- Twice Scorned, Twice Abandoned ( Urchin background)
- Helping the other captives escape:
- Always a Way Out ( Criminal background)
- Breakout! ( Folk Hero background)
- Bugging Out ( Urchin background)
- Escape Artisan ( Criminal background)
- Simple Tools, Great Works ( Guild Artisan background)
Rescuing all imprisoned tiefling refugees and deep gnomes grants the following achievement:
Saving particularly Cal, Danis, Lakrissa and Lia from the prison is one of several necessary conditions for acquiring another achievement:
- Leave No One Behind
- Save every tiefling refugee you can throughout the game in a single playthrough.
Moonrise Towers Rooftop edit
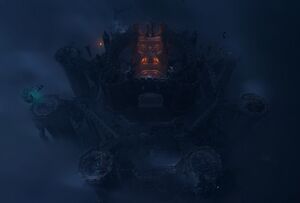
The way to the rooftop is past the Ornate Door on the first floor, guarded by Radija, Necromites (4x) and, possibly, Glourik.
After holding the trial in the throne room, Ketheric Thorm moves here, leaving to Z'rell orders not to disturb him under any circumstances. The general's retinue at the rooftop is Susdera and several more Necromites.
However, the party can sneak through the door and past Ketheric's guards to explore the area. A variety of methods can be used to get to the rooftop early, primarily among them invisibility or greater invisibility. In addition, if the party sneak invisibly past Ketheric Thorm before the "trial" cutscene with members of the Absolute's forces from the Goblin Camp is enacted, they can explore and deal with those on the rooftop without Ketheric there, making combat with him later on considerably easier.
- If the player character chose to side with the forces of the Absolute and both helped to retrieve Aylin from the Gauntlet of Shar and resolved Isobel's fate, they are granted a personal audience with the Absolute in Ketheric's presence[8]. There they can finally find out the truth behind the new-sprung goddess, but this knowledge leads to a sad finale: the party members are still protected by the Astral Prism, and, as the Absolute is unable to overcome its power, Ketheric orders to take the whole party to the Necrotic Laboratory deep beneath the Moonrise Towers for further scrutiny in Balthazar's hands.
- If the player character decided to save or kill Aylin, Ketheric must be confronted here (for the first time). He is accompanied by Susdera, Squire and a pack Necromites (8x). However, he does not take the chances in any case and after losing approximately ⅔ HP retreats to the Mind Flayer Colony underneath his stronghold, either taking the knocked-out Aylin with him or alone.
If Ketheric is spoken with here without saving or killing Aylin (regardless of the current state of Resolve the Abduction quest), he is furious with the player character who did not wait as instructed. He turns hostile, but cannot be defeated, as he is still immortal.
Behind the overstory where Ketheric stands initially, from the locked Heavy Chest, a Ring of Exalted Marrow can be looted.
Meeting Ketheric on the rooftop grants the inspirational event Top of the Ladder for party members with the Noble background.
Docks edit

The docks are accessed through Heavy Oak Doors in the prison. Also, if coming from the Shadow-Cursed Lands, the party can walk under the bridge to Moonrise and then to the east, jumping over a destroyed bridge at X: -100 Y: -149.
If the player character chooses this way as an access to Moonrise Towers for the first time, they are greeted by Zealot Krizt near the bridge. The dialogue with her is mostly the same as with Zealot Malik at the main entrance (see above), but, unlike him, talking to Krizt does not grant any approval or disapproval points from any of the companions. After the party got inside Moonrise Towers proper, Krizt disappears from the docks (her corpse can be found in the Oubliette after the next long rest).
From the entrance to the prison, the stone-paved sideways run along the Moonrise Towers' walls to both sides. Along them, several crates with Zhentarim sigils on them can be found (on which some of the companions comment). At X: -122 Y: -215 a Cat Hole leads to the balcony behind the sanguine laboratory, obviously used by Steelclaw to hunt down her most favourite prey.
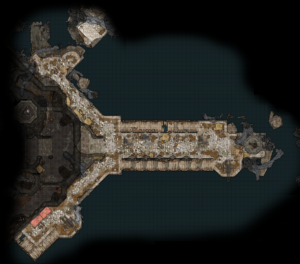
At the docks, ships are being sent out with mysterious cargo, which can be investigated. There are several followers of the Absolute who can be encountered at the docks:
Renan and Bel patrol the pavements, also walking down the wooden berth along the pier approximately to a half of its length. Arden patrols the far end of the docks, near the unused, ruined lighthouse. Marls stands in the middle of the dock, guarding the special cargo with Zhentarim symbols on it.
When first visiting the docks, the party can see a ship there. This very vessel can be encountered later near the smugglers' cave in Rivington.
Talking to Acolyte Marls may result in him realizing that the actual contents of the cargo is "worms all over" and jumping into the water to his death (to wash them off, as might be suggested by the player character). Taking this course of action grants Swimming with the Shadows inspirational event for the Dark Urge, as well as following companion approval or disapproval points: +1 -1 -1 -1 +1 +1 -1
Provoking Marls to commit a suicide is considered an an Oath-breaking action for the Paladin characters with Oath of the Ancients, Oath of the Crown and Oath of Devotion subclasses[9].
Of all crates in the docks and around the side pavements only those marked with Zhentarim sigil may contain some useful items. Also, a total of three Mind Flayer Parasite Specimens can be collected in this area: two from the Zhentarim Shipping Crate and one from the lifeless body of Zealot Krizt if she is killed on the docks.
History edit
Originally, Moonrise Towers[10] was a symbol of devotion to the goddess Selûne, the Moonmaiden. It was built on command of Ketheric Thorm by Morfred, the head of local Masons' Guild in nearby Reithwin Town. After the construction was finished, Ketheric moved in to live there with his wife Melodia and his daughter Isobel.
After both Melodia and Isobel's deaths, Ketheric turned to Shar, the Lady of Loss. In her name, he recovered and reconsecrated a subterranean Temple to Shar, where he raised an army of Dark Justiciars to set his new goddess' influence upon the surrounding lands, and conquer territories far beyond to please her. Most his subjects in Reithwin Town and nearby converted to worshipping Shar, following their leader or being intimidated into reporting on other people. Some, however, offered the Lady of Loss the lip service only, while secretly remaining loyal to Selûne. Morfred together with his brother Halfred, led a Selûnite resistance within Reithwin Town.
Eventually, Morfred let slip in his drunk what he thought in his drouth, revealing his true attitudes before Thisobald Thorm, and thus was exposed to Ketheric. But before being judged and brutally executed, he (not a moment too soon) met "a man who was no man" and stroke a deal with him.
In exchange for Morfred's soul, the devil sicced the orthon Yurgir onto the army of the Dark Justiciars mustered by Ketheric in the depths of the Gauntlet of Shar.
Those of Ketheric's forces who survived the massacre in the Gauntlet of Shar (except Lyrthindor), were eventually defeated by the allied army of Harpers and Emerald Grove druids.
Before Ketheric could be brought to justice, he unleashed the Shadow Curse based on Shar's Shadow Weave, which wrapped his own stronghold, Reithwin Town and the vast region around – and warped most things and inhabitants within. The curse caused immense damage and death across the land and has been persisting for the following century.
At the same time, not long after Isobel's death the necromancer Balthazar crept into Ketheric's trust, promising him a way to possibly return his daughter to life with the help of his art. Following Balthazar's preaches, Ketheric changed his devotion again, this time turning to worship Myrkul, the Lord of Bones.
During the fifteenth century, Myrkul himself appeared to Ketheric, promising him to fulfil his greatest desire: to return Isobel. For this, Ketheric sacrificed his body and soul, and became Myrkul's Chosen. He joined Enver Gortash and The Dark Urge (and later Orin the Red instead of the latter) in the Dead Three's plot of acquiring ultimate power over the Sword Coast through the Cult of the Absolute.
Waypoints edit
This location contains the following Waypoint:
Related locations edit
Related quests edit
Characters edit
Traders edit
Loot edit
Looted or obtained as a quest rewards edit
- – wielded by Z'rell
- – in Ketheric Thorm's room
- – in a locked chest in Balthazar's hidden room
- – in Balthazar's chambers
- – in Balthazar's chambers
- – wielded by Radija
- – in a Heavy Chest on the rooftop
- – can be created in Balthazar's hidden room
- – on a Mimic in Melodia Thorm's room
Lann Tarv's shop edit
If convincing Disciple Z'rell to help, Lann Tarv also sells:
Roah Moonglow's shop edit
Araj Oblodra's shop edit
Literature edit
Books and notes found in other parts of Moonrise Towers are listed on corresponding pages
Main Floor edit
- – in Araj Oblodra's lab
- – in Araj Oblodra's lab
First Floor edit
Balthazar's Chambers edit
- – on the adjacent balcony
- – in the secret section
Isobel's Room edit
- – looted from Mimic
Ketheric's Chambers edit
- – under the loose planks near the bed
- – in the Opulent Chest
Z'rell's Study and elsewhere edit
- – on the altar across the Ornate Door
- – on the altar on the roof
- – looted from Glourik
References edit
- ↑ Labelled "Absolute's Door".
- ↑ If Astarion is left in camp, Araj refers to some rumours about the party and asks that he be brought to her.
- ↑ After finishing both tasks, the player character is granted an audience with the Absolute in Ketheric's presence, which takes place on the rooftop (see the section about the rooftop).
- ↑ If the check is failed, another party member can talk to Z'rell, ask her about the prominence of the relic, and try to pass the check, too. This trick can be repeated for every party member.
- ↑ If solving the puzzle without mistakes, Sage characters are granted both inspirations, if otherwise, only the second one.
- ↑ Using the True Soul option in the dialogue still leads to a fight, but only the Winged Horror in dialogue is considered an enemy. Once killed, the others remain neutral to the player character.
- ↑ It is called "Isobel's room" in the description to the Enter Nostalgia inspirational event.
- ↑ Isobel may die throughout the abduction battle or by the hands of the Dark Urge. In this case, the audience scene is also triggered, but Ketheric reacts to the party's actions much more sternly.
- ↑ Vengeance Paladins do not break their Oath doing this.
- ↑ As per following books and notes found within the game: Diary of Ketheric Thorm, Vol 1, Vol 2 and Vol 3, Halfred's Note, Madeline's Ledger, Mason's Log and The Waning Moon: Consignments; as well as dialogues with Aylin, Elder Rothé, Halsin, Infernal Mason, Jaheira, Ketheric Thorm, Stonemason Kith, Madeline and Yurgir.
External links edit
- Moonrise Towers on the Forgotten Realms Wiki


