Ad placeholder
Confront the Elder Brain
Confront the Elder Brain is a quest in Act Three of Baldur's Gate 3.
Objectives
Walkthrough
Confronting the Elder Brain
Confronting the Elder Brain is acquired at the end of Act Two, after the Chosen Three are revealed to be controlling the Elder Brain as part of their plot to take over Baldur's Gate. However, the quest cannot be meaningfully progressed until and have successfully been completed. Orin must be defeated and Gortash must either be defeated or his bargain accepted as part of . Defeating both Orin the Red and Enver Gortash causes a vision of the Elder Brain in the Morphic Pool beneath the city. If Gortash is allied with, then he reveals the Elder Brain's location and tells the party to use the boat under the city to meet him there.
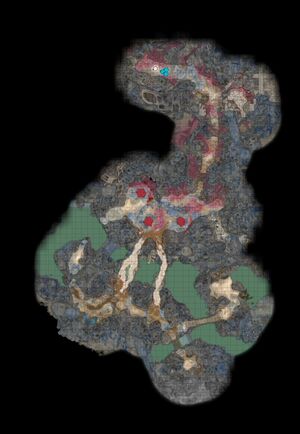
The Morphic Pool Dock is north of the Temple of Bhaal waypoint. Approaching the dock before obtaining all three Netherstones results in a swarm of Cranium Rats attacking.
Important: Boarding the boat to the Morphic Pool is a point of no return and the start of the endgame. After this, it is not possible to long rest or visit camp anymore. Those Companions not brought along in the party will show up in the finale scenes wearing whatever you have left them wearing in the camp. It's recommended to plan accordingly when choosing the desired companions for the final battles.
The Morphic Pool
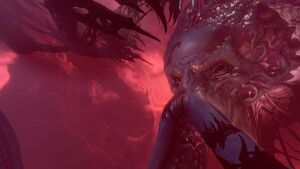
Arriving at the Morphic Pool, the party must make several Constitution checks to not be mindbroken by the Elder Brain. It speaks to the party, demanding obedience. As the party moves further north, a Perception check reveals an ambush oncoming which can be avoided by sneaking through the whole area. The party is attacked by several Intellect Devourers and Intellect Glutton. The Emperor remarks that something is corrupting the creatures.
Once the Morphic Pool's waters are reached, the party takes control of the Netherstones to confront the Elder Brain, which has become a Netherbrain, in a number of difficult checks:
- [STRENGTH] Muster the full might of your physical form - throw it into breaking through the brain's defences. (DC 20)
- [INTELLIGENCE] Your mind is yours to command - block out all possibility of failure and compel the brain to submit. (DC 20)
- [CONSTITUTION] You have survived this far - trust yourself. Dominate the brain. (DC 20)
The brain continues to taunt the party. She says the Chosen Three controlled her only for as long as she allowed them to.
- [GALE] [ARCANA] Draw on the power of the Weave and try again. You will not let the Crown slip from your grasp. (DC 25)
- [DEXTERITY] The Crown is an unmissable target - set it in your sights, and trust that you will strike true. (DC 25)
- [WISDOM] A first attempt is just that - iteration is key. Aim for the Crown and try again. (DC 25)
- [CHARISMA] Nothing is immune to influence - determine to master the brain. (DC 25)
- Bow before the glory of the Netherbrain. Submit to domination.
The Netherbrain tells the party she was the one who informed the Chosen of the ![]() Astral Prism and planted fear of what Orpheus could do to their plan. She was the one who let the Emperor slip its leash so that it could retrieve the prism and loosen the Netherstones from the Chosen Ones' grasps.
Astral Prism and planted fear of what Orpheus could do to their plan. She was the one who let the Emperor slip its leash so that it could retrieve the prism and loosen the Netherstones from the Chosen Ones' grasps.
- [STRENGTH] You are strong. You are mighty. You will dominate the brain. (DC 30)
- [CONSTITUTION] Your resilience will not be shaken - cast the spell again. (DC 30)
- [INTELLIGENCE] It may not be easy, but it was always supposed to be possible - do it again. (DC 30)
- Bow before the glory of the Netherbrain. Submit to domination.
One final, near impossible check remains. While a critical success will weaken the Netherbrain for the final fight, in the short term the result is inconsequential, as the Netherbrain is too powerful.
- [STRENGTH] DOMINATE THE BRAIN (DC 99)
- [DEXTERITY] DOMINATE THE BRAIN (DC 99)
- [INTELLIGENCE] DOMINATE THE BRAIN (DC 99)
- [WISDOM] DOMINATE THE BRAIN (DC 99)
- [CHARISMA] DOMINATE THE BRAIN (DC 99)
- Give up. Allow the brain to dominate you.
Regardless of what the party does, the brain is simply too powerful, and the party is knocked unconscious. The Emperor steps in to save them by bringing everyone inside the Astral Prism. However, if the final DC 99 check to "DOMINATE THE BRAIN" was passed with a critical success, the Netherbrain will start with the debuff, lowering its HP by 20%
The Astral Prism
The party awakens in the Astral Prism having benefited from a Long Rest and losing all Elixirs and "Until Long Rest" duration buffs they may have had. Certain items abilities which replenish their effect on a Long Rest also appear to be consumed even if they hadn't been. This is believed to be a bug.
The Emperor states that only an illithid can hope to take down the Netherbrain in its current form and that the illithid must consume the power of Prince Orpheus in order to succeed. As an illithid, the Emperor says he can do this, and asks the Netherstones be relinquished to him.
If the party rejects the Emperor's proposition, he states that he has no other choice but to reassimilate with the Netherbrain, and leaves the party in the Astral Realm. This can be done by selecting "I don't believe a word you just said" followed by "I will never trust you", by asserting the intent to free Orpheus if the party possesses the ![]() Orphic Hammer, by attacking him, or by equipping the Hammer and using it to attack the crystals binding Orpheus regardless of dialog. After the Emperor departs, if the party has the Hammer a character must equip it and strike both binding crystals to free Orpheus and advance the quest.
Orphic Hammer, by attacking him, or by equipping the Hammer and using it to attack the crystals binding Orpheus regardless of dialog. After the Emperor departs, if the party has the Hammer a character must equip it and strike both binding crystals to free Orpheus and advance the quest.
It is possible to spurn the Emperor even if the party does not possess the Hammer. In this case, what happens next depends on the player's previous interactions with Raphael:
- If the party did not accept Raphael's deal and he is still alive, he appears within the Astral Prism. He has front row seats to the final hour, and now he's come with the sole salvation of Faerun. There are no more deals: only master and vassal. Sign a contract for the Orphic Hammer in exchange for the Crown of Karsus, or the world ends. Failing to uphold the bargain will mean the party's souls are forfeit. Refusing to sign turns the party into mind flayers who assimilate into the Netherbrain, causing a game over. The party is thus forced to .
- If the party made a deal with Raphael and forgot to bring the Orphic Hammer, he will appear to deliver the world-saving relic they so negligently misplaced.
- If Raphael is dead and no member of the party was carrying the Hammer when they entered the prism, it cannot be retrieved and a game over ensues: the party is overcome by the Absolute, transformed into Illithids and assimilated.
Once Orpheus is freed, he confronts the party on their choices, saying the party should have let his honor guard kill them, so they could have avoided this whole situation. He also confronts the party if they stole the ![]() Githyanki Egg in . However, he agrees to stand down and works with the party. He states that the Emperor was correct and an illithid is necessary to take down the Netherbrain. Either a party member can make the sacrifice, or Orpheus will if everyone refuses.
Githyanki Egg in . However, he agrees to stand down and works with the party. He states that the Emperor was correct and an illithid is necessary to take down the Netherbrain. Either a party member can make the sacrifice, or Orpheus will if everyone refuses.
Otherwise, the party can choose to work with the Emperor. The Emperor can be given the Netherstones, and he assimilates Orpheus by devouring his brain. Another possibility is for Karlach to volunteer to become an illithid, as she is dying from her infernal engine anyway. The player character can also volunteer to become illithid. Whoever becomes illithid can wield the stones.
Regardless of who is allied with, Orpheus/the Emperor joins the party as a temporary companion and opens up a portal to the High Hall. The final battle to defeat the brain has begun.
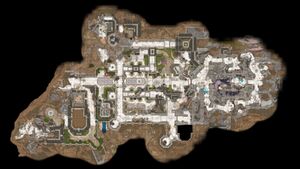
Upper City
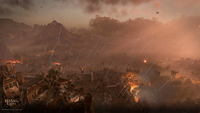
The party returns to Baldur's Gate to find it in shambles. The entire city is a battle between the Nautiloids and an army of Red Dragons.
Kith'rak Voss will teleport in with a group of githyanki to confront the party. If Orpheus was freed, he will offer his aid freely. If The Emperor consumed Orpheus, he will be angry; a ![]() DC 30 Persuasion check or
DC 30 Persuasion check or ![]() DC 30 Deception check will make him stand down and begrudgingly lend his aid; otherwise, he will attack.
DC 30 Deception check will make him stand down and begrudgingly lend his aid; otherwise, he will attack.
Moving forward, the party finds a building where all of their allies are gathered, along with a Flaming Fist named Beorn Wunterbrood. The individuals that appear are based on who was successfully recruited as part of . These allies grant a new action - Call Forth Allies - that can summon reinforcements or utilize powerful AoE attacks.
Courtyard
Upon approaching the courtyard, the party will come across the Watchmen Gyordi, Goodge, Fry, and Ebber running away. A passive ![]() DC 20 Insight check followed by a dialogue option with a
DC 20 Insight check followed by a dialogue option with a ![]() DC 20 Persuasion, Intimidation, Deception, or Strength check will convince them to stand and fight, joining you as allies for the courtyard battle only. On Explorer and Balanced difficulty only, there is also a single-use restoration pod that gives the benefits of a Long Rest.
DC 20 Persuasion, Intimidation, Deception, or Strength check will convince them to stand and fight, joining you as allies for the courtyard battle only. On Explorer and Balanced difficulty only, there is also a single-use restoration pod that gives the benefits of a Long Rest.
Entering the courtyard leads to an all-out battle against various Absolutist cultists, Goblins, Mind flayers, Illithid Arcanists, Winged Horrors, Intellect Devourers, an Ogre, and a Spectator.
It is possible to bypass this battle by avoiding entering through the main entrance, and approaching the High Hall from the northern or southern routes with stealth and invisibility.
Upper City Sewers
Instead of the courtyard, the party can take a hidden route through Upper City Sewers. This route features few goblins, a pair of Cranium Rats, a Mind Flayer, Absolute cultists, Necromites, and a Death Knight named Stalker Svignee. Here also can be found the corpse of Merug 'Curly' Dugald crushed under some debris, which is in possession of a High Hall Key.
The High Hall
After fighting or sneaking their way through the courtyard or the sewers, the party enters the High Hall proper.
The hall contains Intellect Devourers, Mind Flayers, and Banite and Bhaalist cultists. A Nautiloid pulls up and bombards areas and summons Mind Flayer and Intellect Devourer reinforcements every turn.
There are two paths to the top. The left path has a door that must be broken down, lockpicked or opened by using the corresponding key. The right path has a high wall that most characters will not be able to jump up, but a nearby statue that can be pushed over (with a Strength check) to provide a foothold.
At the very top is a door to stem of the Netherbrain. Approaching the stem with any character causes a cutscene that destroys the Nautiloid and ends the fight, and teleports the entire party to this location. On Explorer and Balanced difficulty only, there is another restoration pod. Regardless, the way forward is to climb the Netherbrain.
Possible Gale Decision
Depending on the choices made prior to crossing the "point of no return" and if Gale is in the party, interacting with the Brain Stem can trigger a short conversation between him and the player character. It is now possible to let Gale climb the Brain Stem alone and use his orb to destroy the Netherbrain. If that happens then all the fights described in the rest of this article are completely avoided. After a cutscene with Gale activiating the orb, the party will get directly to the endings and after that to the epilogue of the game.Atop the Netherbrain
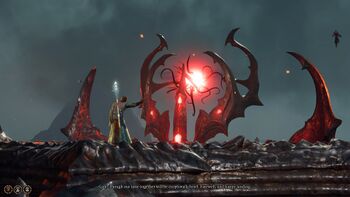
The Netherbrain is guarded by four Illithid Arcanists and a Dominated Red Dragon. There are also sixteen Tentacle enemies hidden under the brain's surface that will appear if an allied character travels within 3m/10ft of them.
The party will also face additional enemies that vary depending on whether the party chose to side with Orpheus or the Emperor:
- If Orpheus was sided with, the Emperor appears on top of the Netherbrain to stop the party. The Emperor conjures four Dream Guardians to fight alongside him, stating that he knows the party's every weakness.
- If the Emperor was sided with, the Netherbrain itself spawns four Countermeasures, powerful Aberrations that are designed to counter specific classes. The Countermeasures summoned depend on the classes of the current party members.
The physical structures of the "Atop the Netherbrain" map area allow for multiple "safe" paths across the brain matter, including two visible paths along the "ridges" of the Crown to the east and west. Staying on these paths will prevent Tentacle enemies from appearing and attacking the party.
At the start of this fight, a counter is issued for 4 turns, after which a Nautiloid ship will arrive and begin using the same "targeting" bombardment seen during the partys' ascent in the High Hall.[1]
Only an illithid party member that is "holding" the Netherstones can cast . To do this, the illithid party member needs to move close enough to the Crown of Karsus, and then cast Karsus' Compulsion for several turns. The party member can be attacked, possibly interrupted, and even killed while attempting to cast this spell. As no other party members can cast the spell in their place, the killed illithid party member must be resurrected to try casting Karsus' Compulsion again, at the next available opportunity.[2]
Successfully casting opens up a portal to the "Mind of the Netherbrain" area, where a physical manifestation of the Netherbrain can be attacked. Killing it before the turn limit, leads to defeat the Netherbrain, once and for all.
Mind of the Netherbrain
This area contains a number of loosely connected floating platforms that are breakable. Periodically, a small group of platforms will be marked for destruction, and their outlines will turn pink. Once a platform is destroyed, any entities that were on the surface are instantly killed and cannot be resurrected during the fight. If winning the fight, then every party member who is killed here or in the "Atop the Netherbrain" area will be resurrected after the fight.
When at least one character successfully passes through the portal, the initiative order will introduce an entity representing the Netherbrain into the turn order.[3]
To reach "The Mind of The Netherbrain" area after this trigger occurs, each individual party member and summoned creature must directly interact with the portal to be brought through, or else they will remain in the "Atop the Netherbrain" area.
Upon successfully interacting with the portal, the party member will appear somewhere inside "The Mind of the Netherbrain", on one of the aforementioned breakable platforms (out of the rough "half-ring" grouping of platforms that is farthest away from the Netherbrain). Once all party members are either inside the "Mind of the Netherbrain" area, or have been killed while still in the "Atop the Netherbrain" area, the turn order will truncate down to include just the entities present inside the "Mind of the Netherbrain" area.
The Unbreakable Will of the Netherbrain
When the Netherbrain is added into the turn order, a new counter will appear, overwriting the state of the prior timer. If the Netherbrain entity is not killed within the allotted turns, a Game Over screen will occur.
If the final DC 99 check at the Morphic Pool to "DOMINATE THE BRAIN" was passed with a critical success, the Netherbrain will start with the debuff, lowering its HP by 20%.
At the start of each of the Netherbrains' turns, it may attempt to cast a spell called which summons an entity of that name with an aura condition attached to it, and adds the orb entity into the turn order. When the turn of an orb entity arrives, any platforms afflicted with the orbs' condition be destroyed. The party members and summons on the platforms will be killed.
The first time within each round that the Netherbrain takes damage from another character, it may attempt to cast an ability called , which deals 10-60 damage (minimum of 5 damage if an unspecified save is passed) to all characters who are within 30m of the Netherbrain.
When the Netherbrain reaches 0 hit points it is defeated and a conversation will trigger allowing the party to choose what to do with the defeated Netherbrain.
Final Choice
After the Netherbrain has been defeated, the choice must be made to either or .
Either option leads to the ending of the game, followed by the Epilogue sequence after a six month time jump.
Allies in the Final Fight
| Ally | Power | Benefit |
|---|---|---|
| Arabella | Weavewalker | One must remove all obstacles to follow one's destiny - Arabella's favour grants affected entities benefits of . |
| Astarion | Retinue of the Vampire Lord | Summon 2 Shadows, 2 Giant Skeletons, a Ghast, a Shadow Mastiff, and a Werewolf. |
| Auntie Ethel | Veil of the Weird | Channel Auntie Ethel's magic to render 5 creatures within range invisible. |
| Barcus Wroot | Ironhand Grenadiers | Summon the Ironhand Gnomes to damage and debilitate with thrown grenades. |
| Bhaal | A Most Bloody Inheritance | The Dread Lord Bhaal looks favourable on his chosen. You can cast and your Critical Hit Attack Roll requirement is reduced by 2. This effect can stack. |
| Counsellor Florrick | Florrick's Cohort | Summon Florrick's personal guard - highly defensive warriors who can hold their own in melee. |
| Dame Aylin | Sword of the Silverlight | Summon Dame Aylin, Selûne's shining paladin, to join your side in battle. |
| Dammon | Battle-Ready Owlbear | Summon your Owlbear Cub - all grown up and ready to rage - in full armour. |
| Duke Ravengard | Rallied | Galvanising word and will of Duke Ravengard runs hot through your veins - gain 30 Temporary Hit Points. |
| Halsin | Spirit of the Land | The reunited soul of Thaniel provides a +1 to all Ability Scores and an additional 2m movement speed to all affected entities. |
| Isobel | Balm of the Moonmaiden | Call upon Isobel to offer a furtive prayer to Selûne, healing up to 6 nearby allies. |
| Jaheira | Silver Harp Squadron | Summon elite Harper archers to provide ranged support from your back ranks. |
| Kith'rak Voss | Kirh'raki Inferno | Damage: 12-72. Command the red dragon of Supreme Kith'rak Voss to breathe a wall of fire onto the battlefield. |
| Lorroakan | Lorroakan's Firestorm | Damage: 20-120. Lorroakan uses all the arcane might of Ramazith's Tower to call down a fiery barrage. |
| Mizora | Mizora, Agent of Avernus | Summon Wyll's pactmistress to rain down powerful infernal sorcery and possibly Disintegrate your foes. |
| Mol | Fetcher's Favour | Equipped with Mol's tricks of the trade, affected entities can cast Rays of Fire, reduce all |
| Nine-Fingers Keene | Guildmaster Keene's Fixers | Summon two elite assassin mercenaries from the Guild's ranks. |
| Prince Orpheus | Orphic Favour | While within 18m of Orpheus, the affected entity has Resistance to |
| Rolan | Rolan's Firestorm | Damage: 20-120. Call upon Rolan, freed from the limitations of Lorroakan, to unleash a fiery barrage from the heights of Ramazith's Tower. |
| Dark Justiciar Shadowheart | Nightbringer's Shadow Adepts | Summon two Sharran Novices and two Sharran Fidelians. |
| Strange Ox | An Apple a Day | Summon Zlorb - a shapeshifting monstrosity that can adopt the aspect of several monsters and beasts. |
| Ulma | Gur Huntwardens | Summon Gur monster hunters to hinder enemies while slipping in and out of the frontlines. |
| Valeria | The Watch | Summon some of the City Watch's great weapon fighters to protect their home. |
| Viconia | Nightbringer's Shadow Adepts | Summon two Sharran Novices and two Sharran Fidelians. |
| Volo | Volo's Guide to Monsters | With steadfast application of knowledge from Volo's preeminent work, affected entities gain +2 to Attack Rolls, Saving Throws, and Ability Checks. |
| Wulbren Bongle | Ironhand Grenadiers | Summon the Ironhand Gnomes to damage and debilitate with thrown grenades. |
| Yurgir | Hellstalker Yurgir | Summon Yurgir the orthon - a deadly combatant at range or in melee who can become Invisible immediately after attacking. |
| Zevlor | Hellrider Platoon | Summon Zevlor's Hellriders to Smite foes and support frontline allies. |
| Zhentarim | Black Fist Enforcers | Summon two elite assassin mercenaries from the Zhentarim's ranks. |
Achievements
Notes
- Despite being a possible ally in Gather Your Allies, the Gondians do not appear to have a summon/ability.
- ↑ At time of writing, the turn counter UI element may display as having five "sections" around its circle, with one section depleted, but still otherwise functions as only allowing up to 4 turns. It's basically impossible to confirm if this UI element behavior is a "bug", or if it had to be implemented this way for another reason.
- ↑ The resurrected illithid party member will still have the usual effects of being resurrected while in combat, and there may be multiple turns before they are capable of taking actions again.
- ↑ If Examined, the full name of the Netherbrain's entity is revealed to be "The Unbreakable Will of the Netherbrain", but in the Combat Log and Initiative Order this entity is still labelled as "The Netherbrain."
