Ad placeholder
Gather Your Allies (quest): Difference between revisions
Jump to navigation
Jump to search


HiddenDragon (talk | contribs) m (HiddenDragon moved page Gather Your Allies to Gather Your Allies (quest)) |
Highlander7 (talk | contribs) No edit summary |
||
| (42 intermediate revisions by 10 users not shown) | |||
| Line 10: | Line 10: | ||
[[File:High Hall Allies Quest.jpg|thumb|380px|{{noexcerpt|The party's allies have gathered to fight the Absolute.}}]] | [[File:High Hall Allies Quest.jpg|thumb|380px|{{noexcerpt|The party's allies have gathered to fight the Absolute.}}]] | ||
: | : | ||
[[File:Gather Your Allies | [[File:Gather Your Allies class action Icon.webp|left|70px]] | ||
'''Gather Your Allies''' is a main [[Quest]] spanning all three Acts of Baldur's Gate 3. It is obtained in [[Act One]] and completed in [[Act Three]]. Its objectives are completed as various quests are completed during the campaign. | '''Gather Your Allies''' is a main [[Quest]] spanning all three Acts of Baldur's Gate 3. It is obtained in [[Act One]] and completed in [[Act Three]]. Its objectives are completed as various quests are completed during the campaign. | ||
{{TOC|limit=2}} | {{TOC|limit=2}} | ||
| Line 80: | Line 80: | ||
== Walkthrough == | == Walkthrough == | ||
Some objectives for this quest are mutually exclusive. For example, siding with {{CharLink|Nine-Fingers Keene}} during {{Quest|Aid the Underduke}} locks the party out of being able to ally with the [[Zhentarim]] in the same playthrough. | |||
All [[Companions]] must be recruited in [[Act One]] and their [[Quests#Companions|personal story quests]] must be resolved for their objectives to be completed in Gather Your Allies. | |||
== | {| class="wikitable" | ||
|+Allies | |||
[[ | !Name | ||
[[ | !Recruitment | ||
!Result | |||
|- | |||
|style="vertical-align:top;"|{{ImageCharLink|Arabella}} | |||
|style="vertical-align:top;"|To recruit [[Arabella]], the following conditions must be met: | |||
{{ | * In Act One, completing [[Save the Refugees]] by siding with the Tieflings. | ||
* In [[Act Two]], completing [[Find Arabella's Parents]]. | |||
* (Optional) In [[Act Three]], finding Arabella in the [[Lower City Sewers]], where she agrees to help the party. | |||
[[ | |style="vertical-align:top;"|[[File:Freedom of Movement Icon.webp|left|thumb|130px|'''[[Weavewalker]]''']]One must remove all obstacles to follow one's destiny. Arabella's favour grants affected entities [[Freedom of Movement]]. | ||
[[ | |- | ||
|style="vertical-align:top;"|{{ImageCharLink|Astarion}} | |||
|style="vertical-align:top;"|To recruit [[Astarion]], the following conditions must be met: | |||
* If | * In Act Three, defeating [[Cazador]] and completing the Black Mass ritual to help Astarion become an ascended vampire. | ||
|style="vertical-align:top;"|[[File:Retinue of the Vampire Lord Icon.webp|left|thumb|130px|'''[[Retinue of the Vampire Lord]]''']]Summon 2 [[Shadow]]s, 2 [[Giant Skeleton]]s, a [[Ghast]], a [[Shadow Mastiff]] and a [[Werewolf]]. | |||
|- | |||
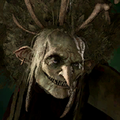
|style="vertical-align:top;"|{{ImageCharLink|Auntie Ethel}} | |||
|style="vertical-align:top;"|To recruit [[Auntie Ethel]], the following conditions must be met: | |||
[[File: | * Completing [[Get Help from Auntie Ethel]] and following at least a part of the [[Save Mayrina]] questline. After fighting Auntie Ethel and reducing her health a sufficient amount, Ethel tries to make a deal for a permanent stat boost in exchange for keeping Mayrina, leaving their deal intact. | ||
* If Ethel is killed in Act One, it is still possible to work with her by finding her disguised as [[Captain Grisly]] during [[Save Vanra]]. If killing [[Lora Bergauz|Lora]], then Ethel is willing to strike a deal with the party, even if they killed her previously, as she is so amused by the turn of events. | |||
|style="vertical-align:top;"|[[File:Veil of the Weird Icon.webp|left|thumb|130px|'''[[Veil of the Weird]]:''']]Channel Auntie Ethel's magic to render 5 creatures within range Invisible. | |||
* In Act One, | |- | ||
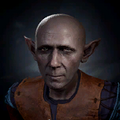
* In Act | |style="vertical-align:top;"|{{ImageCharLink|Barcus Wroot}} | ||
* In Act | |style="vertical-align:top;"|To recruit [[Barcus Wroot]] and the [[Clan Ironhand]], the following conditions must be met: | ||
* In Act One, completing [[Rescue the Gnome]] with Barcus left alive. | |||
* In Act Two, completing [[Save the Grymforge Gnomes]] and [[Rescue Wulbren]] with Wulbren saved. | |||
* In Act Three, completing [[Deal with the Gnomes]], [[Avenge the Ironhands]], and [[Save the Gondians]] with the Gondian's families saved. After Wulbren confronts the Gondians, the party must advocate for the Gondians and Ironhand Gnomes to work together, with Barcus as their leader. | |||
|style="vertical-align:top;"|[[File:Ironhand Grenadiers Icon.webp|left|thumb|130px|'''[[Ironhand Grenadiers]]''']]Summon 2 Ironhand Gnomes, who can throw blinding bombs and shoot [[Smokepowder Arrow]]s. | |||
|- | |||
|style="vertical-align:top;"|{{ImageCharLink|Bhaal}} | |||
|style="vertical-align:top;"|To recruit [[Bhaal]], the following conditions must be met: | |||
* In Act Three, defeating [[Orin]] and choosing to become Bhaal's Chosen. | |||
* The [[Dark Urge]] must be chosen as [[Origin]]. | |||
* In Act | |style="vertical-align:top;"|[[File:A Most Bloody Inheritance Condition Icon.webp|left|thumb|130px|'''[[A Most Bloody Inheritance (Condition)|A Most Bloody Inheritance]]''']]The Dread Lord Bhaal looks favourably on his chosen. You can cast {{SmIconLink|Generic Intent Control Icon.png|Stunning Gaze}} and your [[Critical Hit]] [[Attack Roll]] requirement is reduced by 2. This effect can stack. | ||
* | |- | ||
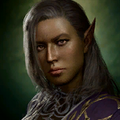
|style="vertical-align:top;"|{{ImageCharLink|Counsellor Florrick}} | |||
|style="vertical-align:top;"|To recruit [[Florrick]], the following conditions must be met: | |||
* In Act One, rescuing her from a burning building in the initial stages of [[Rescue the Grand Duke]] at [[Waukeen's Rest]]. | |||
* In Act Three, freeing her from [[Wyrm's Rock Prison]] to complete [[Free Counsellor Florrick]]. | |||
|style="vertical-align:top;"|[[File:Florrick's Cohort Icon.webp|left|thumb|130px|'''[[Florrick's Cohort]]''']]Summon 3 highly defensive melee fighters that utilize reach. | |||
[[File: | |- | ||
|style="vertical-align:top;"|{{ImageCharLink|Dame Aylin}} | |||
|style="vertical-align:top;"|To recruit [[Aylin]], the following conditions must be met: | |||
== | * In Act Two, sparing Aylin during [[Find the Nightsong]]. Isobel and Aylin join the camp after [[Ketheric Thorm]] has been defeated. | ||
* In Act One, | * In Act Three, completing Find the Nightsong with Dame Aylin free. | ||
* In Act | |style="vertical-align:top;"|[[File:Sword of the Silverlight Icon.webp|left|thumb|130px|'''[[Sword of the Silverlight]]''']]Summon Dame Aylin, to join your side in battle. | ||
|- | |||
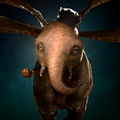
|style="vertical-align:top;"|{{ImageCharLink|Dammon}} | |||
|style="vertical-align:top;"|To recruit the [[Armoured Owlbear|Owlbear Cub]], the following conditions must be met: | |||
{{ | * In Act One, completing [[Save the Refugees]] by siding with the Tieflings. | ||
* In Act One, recruiting the [[Owlbear Cub]] from the [[Owlbear Nest]] to the camp. | |||
* In Act Two, saving [[Isobel]] from being killed or kidnapped during [[Resolve the Abduction]]. | |||
[[ | * In Act Two, sparing Aylin during [[Find the Nightsong]]. | ||
|style="vertical-align:top;"|[[File:Battle-Ready Owlbear Icon.webp|left|thumb|130px|'''[[Battle-Ready Owlbear]]''']]Summon your [[Armoured Owlbear|owlbear cub]], all grown up and ready to rage; in full armour. | |||
|- | |||
* In Act One, | |style="vertical-align:top;"|{{ImageCharLink|Ulder Ravengard}} | ||
* In Act | |style="vertical-align:top;"|To recruit [[Ulder Ravengard]], the following conditions must be met: | ||
* | * In Act Three, saving the Duke at the end of [[Rescue the Grand Duke]]. This can be achieved by Wyll remaining in a pact with Mizora in exchange for the Duke's location, or by rescuing the Duke in the Iron Throne prison during the [[Save the Gondians]] quest. | ||
|style="vertical-align:top;"|[[File:Rally Icon.png|left|thumb|130px|'''[[Rallied (Endgame)|Rallied]]''']]Galvanising word and will of Duke Ravengard runs hot through your veins - gain 30 temporary hit points. | |||
|- | |||
|style="vertical-align:top;"|{{ImageCharLink|Zanner Toobin}} | |||
|style="vertical-align:top;"|To recruit [[Zanner Toobin]] and the [[Gondians]], the following conditions must be met: | |||
[[File: | * In Act Three, completing [[Save the Gondians]], and save ALL of the Gondians. | ||
[[ | |style="vertical-align:top;"|[[File:Gondian Steel Watcher Icon.webp|left|130px|thumb|[[Gondian Steel Watcher]]]]Summon a recalibrated bipedal Steel Watcher. | ||
|- | |||
* In Act Three, | |style="vertical-align:top;"|{{ImageCharLink|Halsin}} | ||
|style="vertical-align:top;"|To recruit [[Halsin]], the following conditions must be met: | |||
* In Act One, saving Halsin at the end of [[Rescue the Druid Halsin]]. | |||
{{ | * In Act One, completing [[Save the Refugees]] by rescuing the Tieflings and stopping the ritual in the Grove. After this Halsin travels with the party to the [[Shadow-Cursed Lands]]. | ||
* In Act Two, speaking with [[Art Cullagh]] at [[Last Light Inn]], then visiting Halsin in camp and telling him that Art mentioned Thaniel to begin the quest to [[Wake up Art Cullagh]]. Alternatively, the party can use {{SAI|Speak with Dead}} on his corpse if he died during [[Resolve the Abduction]]. At this point, completing [[Lift the Shadow Curse]] is mandatory, so that Halsin joins the party as a permanent companion. | |||
* Halsin must have been fully recruited (by having been added to the party once) to receive this boon. | |||
[[ | |style="vertical-align:top;"|[[File:Spirit of the Land Icon.webp|left|thumb|130px|'''[[Spirit of the Land]]''']]Affected entities gain +1 to all [[Ability Scores]], +2m [[Movement Speed]]. | ||
[[File: | |- | ||
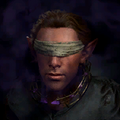
== | |style="vertical-align:top;"|{{ImageCharLink|Isobel Thorm|Isobel}} | ||
* In Act | |style="vertical-align:top;"|To recruit [[Isobel]], the following conditions must be met: | ||
* In Act | * In Act Two, completing [[Resolve the Abduction]] without Isobel's death. | ||
* In Act Two, sparing Aylin during [[Find the Nightsong]]. Isobel and Aylin join the camp after [[Ketheric Thorm]] has been defeated. | |||
* In Act Three, completing Find the Nightsong with Dame Aylin being free. | |||
|style="vertical-align:top;"|[[File:Balm of the Moonmaiden Icon.webp|left|thumb|130px|'''[[Balm of the Moonmaiden]]''']]Heal 14d6 up to 6 nearby allies. | |||
|- | |||
[[File: | |style="vertical-align:top;"|{{ImageCharLink|Jaheira}} | ||
[[ | |style="vertical-align:top;"|To recruit [[Jaheira]] and the [[Harpers]], the following conditions must be met: | ||
* In Act Three, completing [[The High Harper]] with [[Minsc]] left alive. After Minsc is tracked down, he must be defeated with a non-lethal strike, then given protection by the Astral Prism, and shown that the real Jaheira is alive. After this, Minsc joins the party as a Companion and Jaheira counts herself as a loyal ally to the party. | |||
* In Act Two, | |style="vertical-align:top;"|[[File:Silver Harp Squadron Icon.webp|left|thumb|130px| '''[[Silver Harp Squadron]]''']]Summon 3 elite Harper archers, to join your side in battle. | ||
* In Act Two, during [[Find the Nightsong | |- | ||
* In Act Three, | |style="vertical-align:top;"|{{ImageCharLink|Kith'rak Voss}} | ||
|style="vertical-align:top;"|To recruit [[Voss]], the following conditions must be met: | |||
* In Act Three, completing [[Help Kith'rak Voss]] and retrieving the [[Orphic Hammer]] from the [[House of Hope]], then choosing to free [[Orpheus]] during [[Free Orpheus]]. | |||
* As long progressing Help Kith'rak Voss to the point where he asks the party to retrieve the Orphic Hammer, it is still possible to recruit him even if not freeing Orpheus. To do so, a {{Ability check|Persuasion|30}} or {{Ability check|Deception|30}} must be passed when he confronts the party at the start of the final conflict. If the player character is a Mind Flayer, then an additional {{Ability check|Persuasion|25}} or {{Ability check|Intimidation|25}} must be passed before the above ability checks. | |||
|style="vertical-align:top;"|[[File:Wall of Fire Icon.webp|left|thumb|130px|'''[[Kith'raki Inferno]]''']]Command the [[Qudenos|red dragon]] of Supreme Kith'rak Voss to breathe a wall of fire onto the battlefield. 12d6 {{DamageType|Fire}} dmg. | |||
[[File: | |- | ||
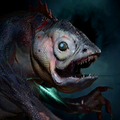
|style="vertical-align:top;"|{{ImageCharLink|Proselyte of Mahkloompah|Kuo-toa}} | |||
= | |style="vertical-align:top;"|To recruit the [[Kuo-toa]], the following conditions must be met: | ||
* In Act | * In Act One, revealing [[BOOOAL]] as a fake god, using Investigation and Performance checks. | ||
* If done right, only BOOOAL and the party enter combat, after defeating BOOOAL {{CharLink|Pooldripp}} names the player character 'Mahkloompah'. After this Pooldripp must be commanded to "build an army". | |||
|style="vertical-align:top;"|[[File:Kuo-Toa Acolytes Icon.webp|left|130px|thumb|[[Kuo-Toa Acolytes]]]]Call the fishfolk faithful from the Underdark to fight for their god - you. | |||
|- | |||
|style="vertical-align:top;"|{{ImageCharLink|Lorroakan}} | |||
|style="vertical-align:top;"|To recruit [[Lorroakan]], the following conditions must be met: | |||
* In Act Two, sparing Aylin during [[Find the Nightsong]]. | |||
[[File:Silver Harp Squadron Icon.webp|thumb|130px| '''[[Silver Harp Squadron]]''' | * In Act Three, completing [[Find the Nightsong]] by helping Lorroakan capture [[Dame Aylin]]. | ||
|style="vertical-align:top;"|[[File:Lorroakan's Firestorm Icon.webp|left|thumb|130px|'''[[Lorroakan's Firestorm]]''']]Lorroakan uses all the arcane might of Ramazith's Tower, 10d6 {{DamageType|Fire}} + 10d6 {{DamageType|Force}} damage. | |||
= | |- | ||
* In Act Three, | |style="vertical-align:top;"|{{ImageCharLink|Mizora}} | ||
|style="vertical-align:top;"|To recruit [[Mizora]], the following conditions must be met: | |||
{{ | * In Act Two, completing [[The Blade of Frontiers]] by saving Mizora in the [[Mind Flayer Colony]]. | ||
* In Act Three, speaking with Mizora at [[Wyrm's Rock]] as part of [[The Grand Duke]]. She then appears at the campsite during the next long rest, and remains there for the rest of the game. Speaking to her and choosing "If you're going to be staying, I need something in return." results in Mizora stating that she wishes to take revenge on the Absolute after being kidnapped. Thus she agrees to help the party in the final fight. She only shows up if also keeping Wyll's pact intact. If breaking the pact, the dialogue appears, too, but she does not join the party for the final fight. | |||
|style="vertical-align:top;"|[[File:Mizora, Agent of Avernus Icon.webp|left|thumb|130px|'''[[Mizora, Agent of Avernus]]''']]Summon Mizora to join your side in battle. | |||
|- | |||
[[ | |style="vertical-align:top;"|{{ImageCharLink|Mol}} | ||
|style="vertical-align:top;"|To recruit [[Mol]], the following conditions must be met: | |||
= | * In Act One, completing [[Save the Refugees]] by siding with the Tieflings. | ||
* In Act | * In Act Three, finding Mol in the Guildhall and learning about her contract with [[Raphael]]. If her contract is stolen from the [[House of Hope]], she agrees to help in the final fight. If Raphael is killed, the contract can be still given to Mol, but Raphael's death must not be mentioned, and a successful Persuasion Check must be passed. As a Warlock, a Warlock specific dialogue choice is in place of the skill check. | ||
|style="vertical-align:top;"|[[File:Rays of Fire Icon.webp|left|thumb|130px|'''[[Fetcher's Favour]]''']]Affected entities can cast [[Rays of Fire]], reduce all {{DamageType|Fire}} damage by 5 and gain additional 1d4 to [[Charisma]] checks and [[Saving Throw]]s. | |||
|- | |||
|style="vertical-align:top;"|{{ImageCharLink|Nine-Fingers Keene}} | |||
|style="vertical-align:top;"|To recruit [[Nine-Fingers Keene]] and the [[the Guild|Guild]], the following conditions must be met: | |||
[[File: | * In Act Three, siding with the [[Guild]] at the end of [[Aid the Underduke]] and keeping Nine-Fingers Keene alive. | ||
|style="vertical-align:top;"|[[File:Guildmaster Keene's Fixers Icon.webp|left|thumb|130px|'''[[Guildmaster Keene's Fixers]]''']]Summon two elite assassin mercenaries. | |||
|- | |||
* In Act | |style="vertical-align:top;"|{{ImageCharLink|Rolan}} | ||
* In Act | |style="vertical-align:top;"|To recruit [[Rolan]], the following conditions must be met: | ||
* In Act One, completing [[Save the Refugees]] by siding with the Tieflings OR telling Rolan to leave the Grove before attacking it with Minthara. | |||
* In Act Two, saving [[Isobel]] from being killed or kidnapped during [[Resolve the Abduction]], then completing [[Find Rolan in the Shadows]] by saving Rolan. | |||
{{ | * In Act Two, rescuing his sister [[Lia]] and his brother [[Cal]] from [[Moonrise Towers Prison]]. | ||
= | * In Act Three, completing [[Find the Nightsong]] by siding with [[Dame Aylin]] against [[Lorroakan]] to have Rolan take over [[Ramazith's Tower]]. If his brother and sister are not rescued in Act Two, he is still be here, but does not side with the party. | ||
|style="vertical-align:top;"|[[File:Rolan's Firestorm Icon.webp|left|thumb|130px|'''[[Rolan's Firestorm]]''']]Call upon Rolan, to unleash a fiery barrage from the Ramazith's Tower. 10d6 {{DamageType|Fire}} + 10d6 {{DamageType|Force}} damage. | |||
|- | |||
[[ | |style="vertical-align:top;"|{{ImageCharLink|Shadowheart}} | ||
|style="vertical-align:top;"|To recruit [[Shadowheart]] and her [[Shar|Sharran followers]], the following conditions must be met: | |||
* In Act Two, not letting [[Shadowheart]] spare [[Dame Aylin]] during [[Find the Nightsong]]. | |||
* In Act | * In Act Three, completing [[Investigate the House of Grief]] by helping Shadowheart overthrow [[Viconia DeVir]] to become the leader of the Sharran cloister. | ||
|style="vertical-align:top;"|[[File:Nightbringer's Shadow Adepts Icon.webp|left|thumb|130px|'''[[Nightbringer's Shadow Adepts]]''']]Summon two Sharran Novices and two Sharran Fidelians. | |||
|- | |||
|style="vertical-align:top;"|{{ImageCharLink|Strange Ox}} | |||
|style="vertical-align:top;"|To recruit [[Strange Ox]], the following conditions must be met: | |||
* Not attacking it during Act One or Two. | |||
* In Act Three, completing [[Help the Devilish Ox]] by smuggling the ox into the [[Lower City]]. | |||
[[File: | |style="vertical-align:top;"|[[File:Generic Summon Icon.webp|left|thumb|130px|'''[[An Apple a Day]]''']]Summon [[Strange Ox|Zlorb]] the shapeshifting monstrosity that can change into different types of monsters. | ||
|- | |||
== | |style="vertical-align:top;"|{{ImageCharLink|Ulma}} | ||
* In Act | |style="vertical-align:top;"|To recruit [[Ulma]] and the [[Gur]], the following conditions must be met: | ||
* In Act Three, completing [[Investigate Cazador's Palace]] by defeating Cazador and stopping the Black Mass ritual. The Gur are grateful and agree to help during the final fight. | |||
|style="vertical-align:top;"|[[File:Gur Huntwardens Icon.webp|left|thumb|130px|'''[[Gur Huntwardens]]''']]Summon two Gur warriors and a Sharpshooter. | |||
|- | |||
= | |style="vertical-align:top;"|{{ImageCharLink|Valeria}} | ||
|style="vertical-align:top;"|To recruit [[Valeria]], the following conditions must be met: | |||
[[File: | * In Act Three, completing [[Solve the Open Hand Temple Murders]] and [[Investigate the Murders]], and rejecting the [[Murder Tribunal]] during [[Impress the Murder Tribunal]]. | ||
[[ | * In Act Three, rescuing Valeria from the Murder Tribunal. | ||
|style="vertical-align:top;"|[[File:The Watch Icon.webp|left|thumb|130px|'''[[The Watch]]''']]Summon three City Watch great weapon fighters. | |||
== | |- | ||
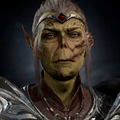
|style="vertical-align:top;"|{{ImageCharLink|Viconia}} | |||
|style="vertical-align:top;"|To recruit [[Viconia DeVir]] and her [[Shar|Sharran followers]], the following conditions must be met: | |||
* In Act Two, sparing Aylin during [[Find the Nightsong]]. | |||
{{ | * In Act Three, completing [[Investigate the House of Grief]] and [[Surrender Shadowheart to Viconia]] by betraying Shadowheart and turning her over to Viconia. If Shadowheart left the party in Act Two after the Gauntlet of Shar, several checks can be passed to get Viconia on the party's side if telling her Shadowheart is already dead. | ||
|style="vertical-align:top;"|[[File:Nightbringer's Shadow Adepts Icon.webp|left|thumb|130px|'''[[Nightbringer's Shadow Adepts]]''']]Summon two Sharran Novices and two Sharran Fidelians. | |||
|- | |||
|style="vertical-align:top;"|{{ImageCharLink|Volo}} | |||
[[ | |style="vertical-align:top;"|To recruit [[Volo]], the following conditions must be met: | ||
[[ | *During Act One, completing [[Rescue Volo]] to free him from the goblins at the [[Goblin Camp]]. | ||
*During Act Three, saving Volo, from his captors near the [[Steel Watch Foundry]] in the [[Lower City]]. He then joins the camp. | |||
|style="vertical-align:top;"|[[File:Volo's Guide to Monsters Icon.webp|left|thumb|130px|'''[[Volo's Guide to Monsters]]''']]Grants +2 to Attack Rolls, Saving Throws and Ability Checks. | |||
* In Act | |- | ||
|style="vertical-align:top;"|{{ImageCharLink|Wulbren}} | |||
|style="vertical-align:top;"|To recruit [[Wulbren Bongle]] and the [[Clan Ironhand]], the following conditions must be met: | |||
* In Act Two, completing [[Rescue Wulbren]] with Wulbren saved. | |||
* In Act Three, completing [[Deal with the Gnomes]] and [[Avenge the Ironhands]] with the Steel Watch disabled. If [[Save the Gondians]] was also completed, Wulbren must be sided with and the Gondians defeated. | |||
|style="vertical-align:top;"|[[File:Ironhand Grenadiers Icon.webp|left|thumb|130px|'''[[Ironhand Grenadiers]]''']]Summon 2 Ironhand Gnomes, who can throw blinding bombs and shoot [[Smokepowder Arrow]]s. | |||
[[File: | |- | ||
|style="vertical-align:top;"|{{ImageCharLink|Yurgir}} | |||
|style="vertical-align:top;"|To recruit [[Yurgir]], the following conditions must be met: | |||
= | * In Act Two, completing [[Break Yurgir's Contract]] by defeating the Dark Justiciar [[Lyrthindor]]. | ||
* In Act | * In Act Three, completing [[Deal with the Devil]] by breaking into the [[House of Hope]]. | ||
* He can be convinced to fight against Raphael with a persuasion check of 30, if the party killed him during [[Kill Raphael's Old Enemy]]. If he is persuaded and Raphael is defeated, then he agrees to help in the final fight. | |||
|style="vertical-align:top;"|[[File:Hellstalker Yurgir Icon.webp|left|thumb|130px|'''[[Hellstalker Yurgir]]''']]Summon Yurgir to join your side in battle. | |||
|- | |||
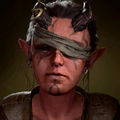
|style="vertical-align:top;"|{{ImageCharLink|Zevlor}} | |||
[[ | |style="vertical-align:top;"|To recruit [[Zevlor]] and his [[Hellriders]], the following conditions must be met: | ||
* In Act One, completing [[Save the Refugees]] by siding with the Tieflings. | |||
* In Act Two, completing [[Find Zevlor]] by freeing him from the pod in the [[Mind Flayer Colony]]. | |||
* | |||
* In Act Three, | |||
{{ | |||
== | |||
* In Act | |||
* In Act Three, | |||
{{ | |||
[[ | |||
[[ | |||
* In Act Three, | |||
[[File: | |||
[[ | |||
* In [[Act Three]] | |||
[[ | |||
* In Act | |||
= | |||
[[ | |||
* In Act One, | |||
* In Act Two, | |||
* This currently has no journal entry. | * This currently has no journal entry. | ||
|style="vertical-align:top;"|[[File:Hellrider Platoon Icon.webp|left|thumb|130px|'''[[Hellrider Platoon]]''']]Summon Zevlor and a Paladin and a Cleric. | |||
|- | |||
|style="vertical-align:top;"|{{ImageCharLink|Zhentarim}} | |||
|style="vertical-align:top;"|To recruit the [[Zhentarim]], the following conditions must be met: | |||
[[File: | * In Act Three, overthrowing the Guild during [[Aid the Underduke]]. | ||
|style="vertical-align:top;"|[[File:Black Fist Enforcers Icon.webp|left|thumb|130px|'''[[Black Fist Enforcers]]]]Summon two elite assassin mercenaries from the Zhentarim's ranks. | |||
|} | |||
* In Act Three, | |||
== | == Consequences == | ||
[[File:Netherese Orb Blast Icon.webp|130px|thumb|[[Netherese Orb Blast]]: Gale can also blow himself up]] | [[File:Netherese Orb Blast Icon.webp|130px|thumb|[[Netherese Orb Blast]]: Gale can also blow himself up.]] | ||
*After completing | *After completing {{Quest|Free Orpheus}}, the final battle begins to {{Quest|Confront the Elder Brain}}. The player character receives the special skill {{SAI|Gather Your Allies (class action)}} which summons friendly units in combat based on the characters who have been recruited. The recruited characters also appear in a room in the [[High Hall]], where they give a short dialogue line of support. | ||
: | : | ||
<div style="clear: both"></div> | <div style="clear: both"></div> | ||
== Notes == | == Notes == | ||
{{notebegin}} | |||
* Volo's passive buff, '''Volo's Guide to Monsters''', is also a [[wikipedia:Volo's_Guide_to_Monsters|manual]] for the Dungeons and Dragons tabletop game. | * Volo's passive buff, '''Volo's Guide to Monsters''', is also a [[wikipedia:Volo's_Guide_to_Monsters|manual]] for the Dungeons and Dragons tabletop game. | ||
{{noteend}} | |||
{{NavQuests}} | {{NavQuests}} | ||
[[Category:Quests]] | [[Category:Quests]] | ||
[[Category:Main Quest]] | [[Category:Main Quest]] | ||
Latest revision as of 02:23, 20 February 2025
"Gather Your Allies" redirects here. For the action this quest grants, see Gather Your Allies (class action).

Gather Your Allies is a main Quest spanning all three Acts of Baldur's Gate 3. It is obtained in Act One and completed in Act Three. Its objectives are completed as various quests are completed during the campaign.
Objectives[edit | edit source]
Objectives and journal entries may vary pending player decisions and outcomes.
Walkthrough[edit | edit source]
Some objectives for this quest are mutually exclusive. For example, siding with Nine-Fingers Keene during ![]() locks the party out of being able to ally with the Zhentarim in the same playthrough.
locks the party out of being able to ally with the Zhentarim in the same playthrough.
All Companions must be recruited in Act One and their personal story quests must be resolved for their objectives to be completed in Gather Your Allies.
| Name | Recruitment | Result |
|---|---|---|
To recruit Arabella, the following conditions must be met:
|
One must remove all obstacles to follow one's destiny. Arabella's favour grants affected entities Freedom of Movement. | |
To recruit Astarion, the following conditions must be met:
|
Summon 2 Shadows, 2 Giant Skeletons, a Ghast, a Shadow Mastiff and a Werewolf. | |
To recruit Auntie Ethel, the following conditions must be met:
|
Channel Auntie Ethel's magic to render 5 creatures within range Invisible. | |
To recruit Barcus Wroot and the Clan Ironhand, the following conditions must be met:
|
Summon 2 Ironhand Gnomes, who can throw blinding bombs and shoot Smokepowder Arrows. | |
| To recruit Bhaal, the following conditions must be met: | The Dread Lord Bhaal looks favourably on his chosen. You can cast | |
To recruit Florrick, the following conditions must be met:
|
Summon 3 highly defensive melee fighters that utilize reach. | |
To recruit Aylin, the following conditions must be met:
|
Summon Dame Aylin, to join your side in battle. | |
To recruit the Owlbear Cub, the following conditions must be met:
|
Summon your owlbear cub, all grown up and ready to rage; in full armour. | |
To recruit Ulder Ravengard, the following conditions must be met:
|
Galvanising word and will of Duke Ravengard runs hot through your veins - gain 30 temporary hit points. | |
To recruit Zanner Toobin and the Gondians, the following conditions must be met:
|
Summon a recalibrated bipedal Steel Watcher. | |
To recruit Halsin, the following conditions must be met:
|
Affected entities gain +1 to all Ability Scores, +2m Movement Speed. | |
To recruit Isobel, the following conditions must be met:
|
Heal 14d6 up to 6 nearby allies. | |
To recruit Jaheira and the Harpers, the following conditions must be met:
|
Summon 3 elite Harper archers, to join your side in battle. | |
To recruit Voss, the following conditions must be met:
|
Command the red dragon of Supreme Kith'rak Voss to breathe a wall of fire onto the battlefield. 12d6 | |
| To recruit the Kuo-toa, the following conditions must be met: | Call the fishfolk faithful from the Underdark to fight for their god - you. | |
To recruit Lorroakan, the following conditions must be met:
|
Lorroakan uses all the arcane might of Ramazith's Tower, 10d6 | |
To recruit Mizora, the following conditions must be met:
|
Summon Mizora to join your side in battle. | |
To recruit Mol, the following conditions must be met:
|
Affected entities can cast Rays of Fire, reduce all | |
To recruit Nine-Fingers Keene and the Guild, the following conditions must be met:
|
Summon two elite assassin mercenaries. | |
To recruit Rolan, the following conditions must be met:
|
Call upon Rolan, to unleash a fiery barrage from the Ramazith's Tower. 10d6 | |
To recruit Shadowheart and her Sharran followers, the following conditions must be met:
|
Summon two Sharran Novices and two Sharran Fidelians. | |
To recruit Strange Ox, the following conditions must be met:
|
Summon Zlorb the shapeshifting monstrosity that can change into different types of monsters. | |
To recruit Ulma and the Gur, the following conditions must be met:
|
Summon two Gur warriors and a Sharpshooter. | |
To recruit Valeria, the following conditions must be met:
|
Summon three City Watch great weapon fighters. | |
To recruit Viconia DeVir and her Sharran followers, the following conditions must be met:
|
Summon two Sharran Novices and two Sharran Fidelians. | |
To recruit Volo, the following conditions must be met:
|
Grants +2 to Attack Rolls, Saving Throws and Ability Checks. | |
To recruit Wulbren Bongle and the Clan Ironhand, the following conditions must be met:
|
Summon 2 Ironhand Gnomes, who can throw blinding bombs and shoot Smokepowder Arrows. | |
To recruit Yurgir, the following conditions must be met:
|
Summon Yurgir to join your side in battle. | |
To recruit Zevlor and his Hellriders, the following conditions must be met:
|
Summon Zevlor and a Paladin and a Cleric. | |
To recruit the Zhentarim, the following conditions must be met:
|
Summon two elite assassin mercenaries from the Zhentarim's ranks. |


Consequences[edit | edit source]
Netherese Orb Blast: Gale can also blow himself up.
- After completing
 , the final battle begins to . The player character receives the special skill
  which summons friendly units in combat based on the characters who have been recruited. The recruited characters also appear in a room in the High Hall, where they give a short dialogue line of support.
Notes[edit | edit source]
- Volo's passive buff, Volo's Guide to Monsters, is also a manual for the Dungeons and Dragons tabletop game.