Ad placeholder
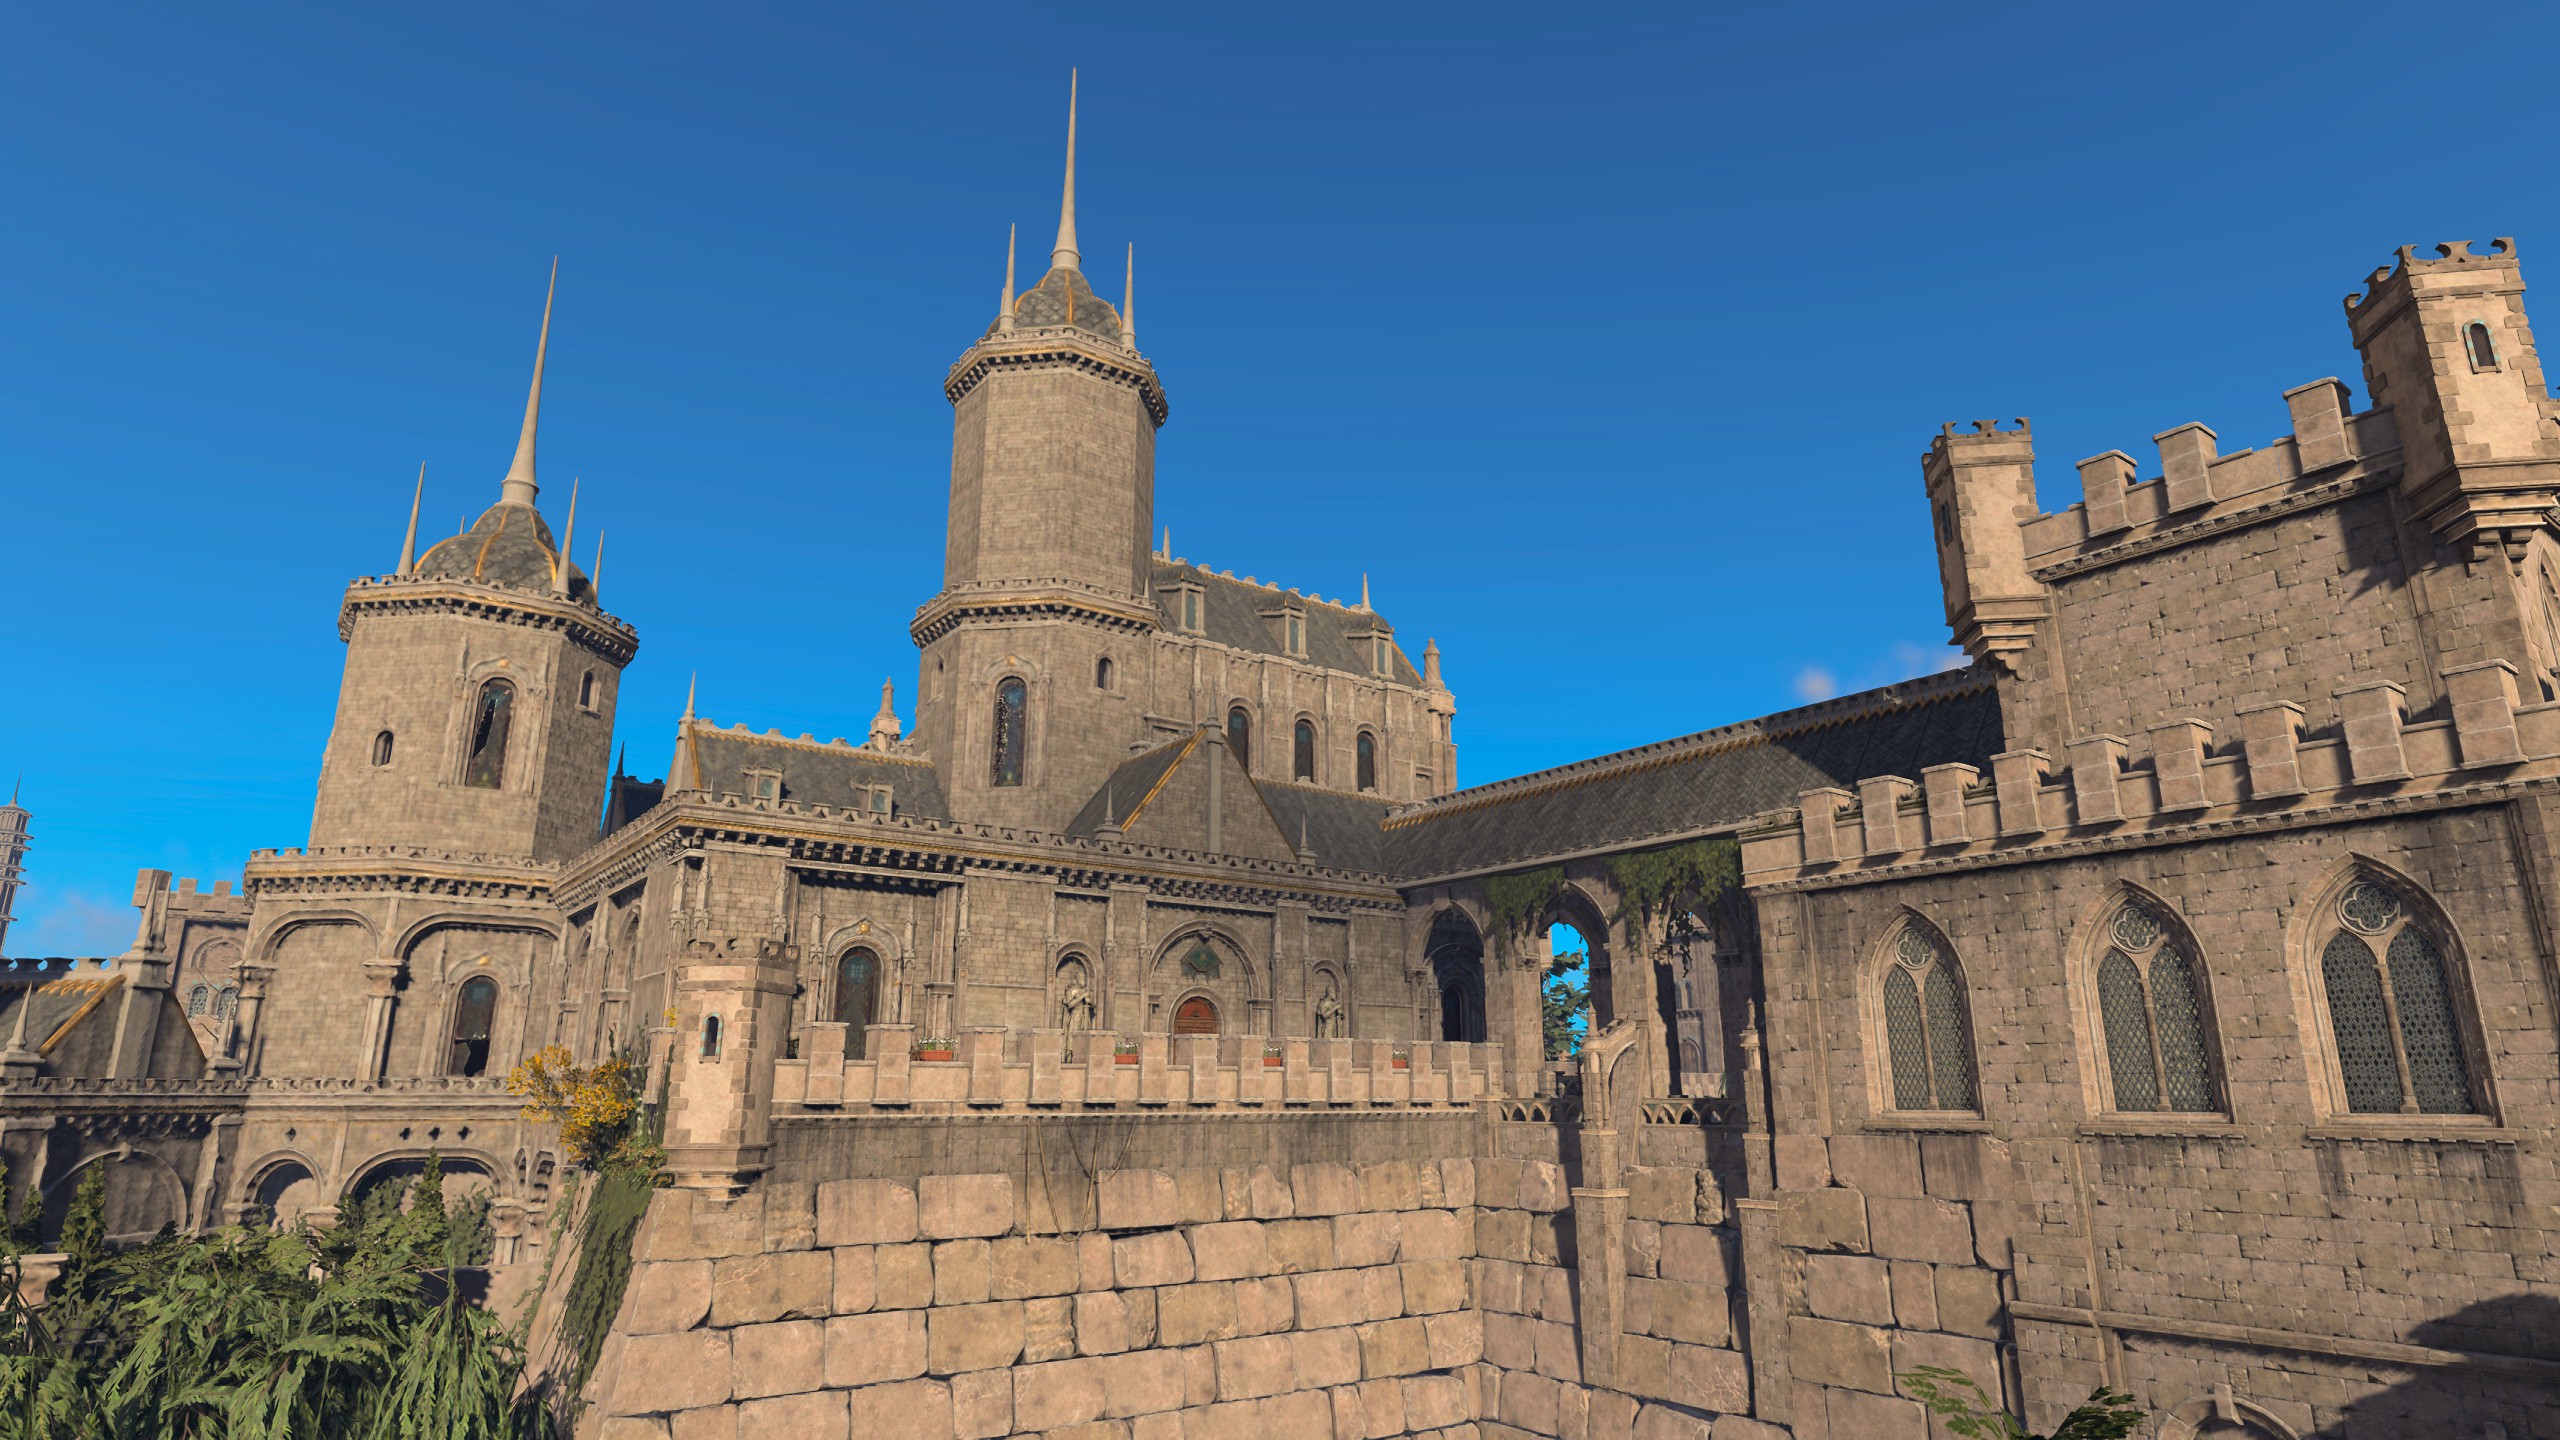
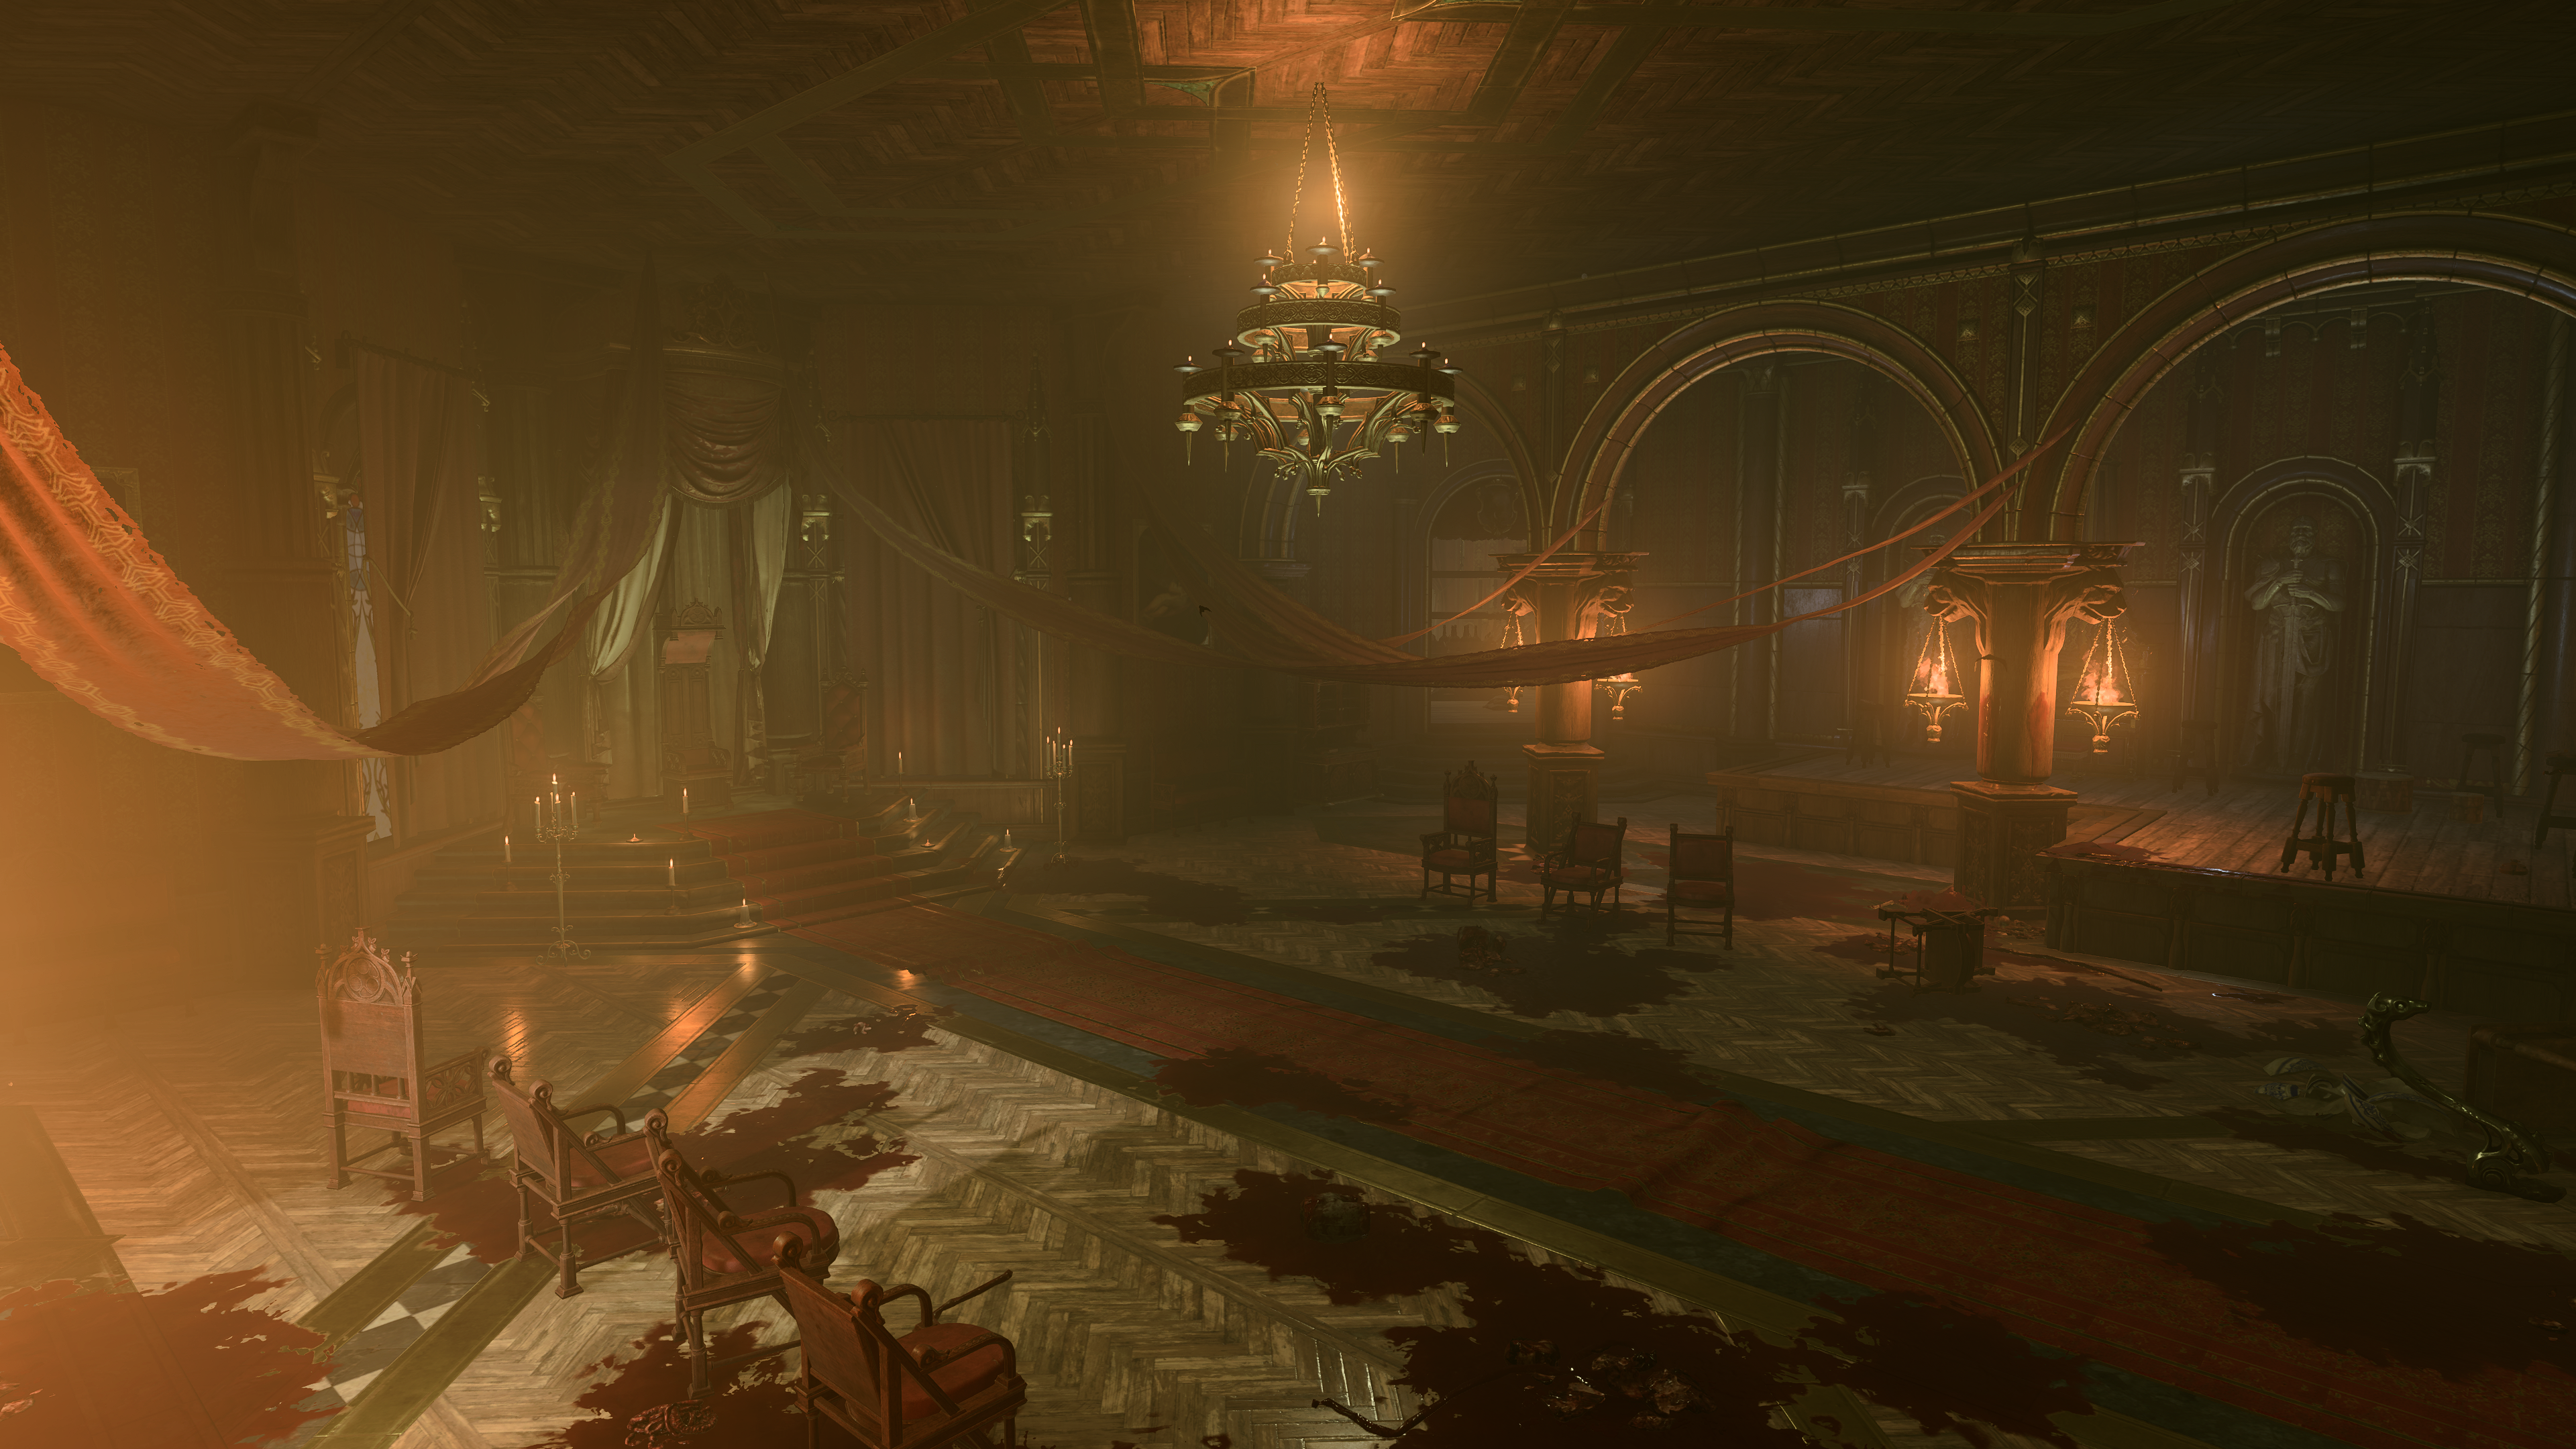
Szarr Palace

| Upper City | ||||
| Bloomridge Park | ← | Szarr Palace | → | Devil's Fee |
| ↓ | ||||
| Central Watch Tower | ||||

“There's the same fading carpet, the same tasteless art... Nothing's changed, but gods, everything feels different. <...> It does feel strange, breaking into your own home. Especially if murder's on your mind.„
Overview[edit section | visual editor]

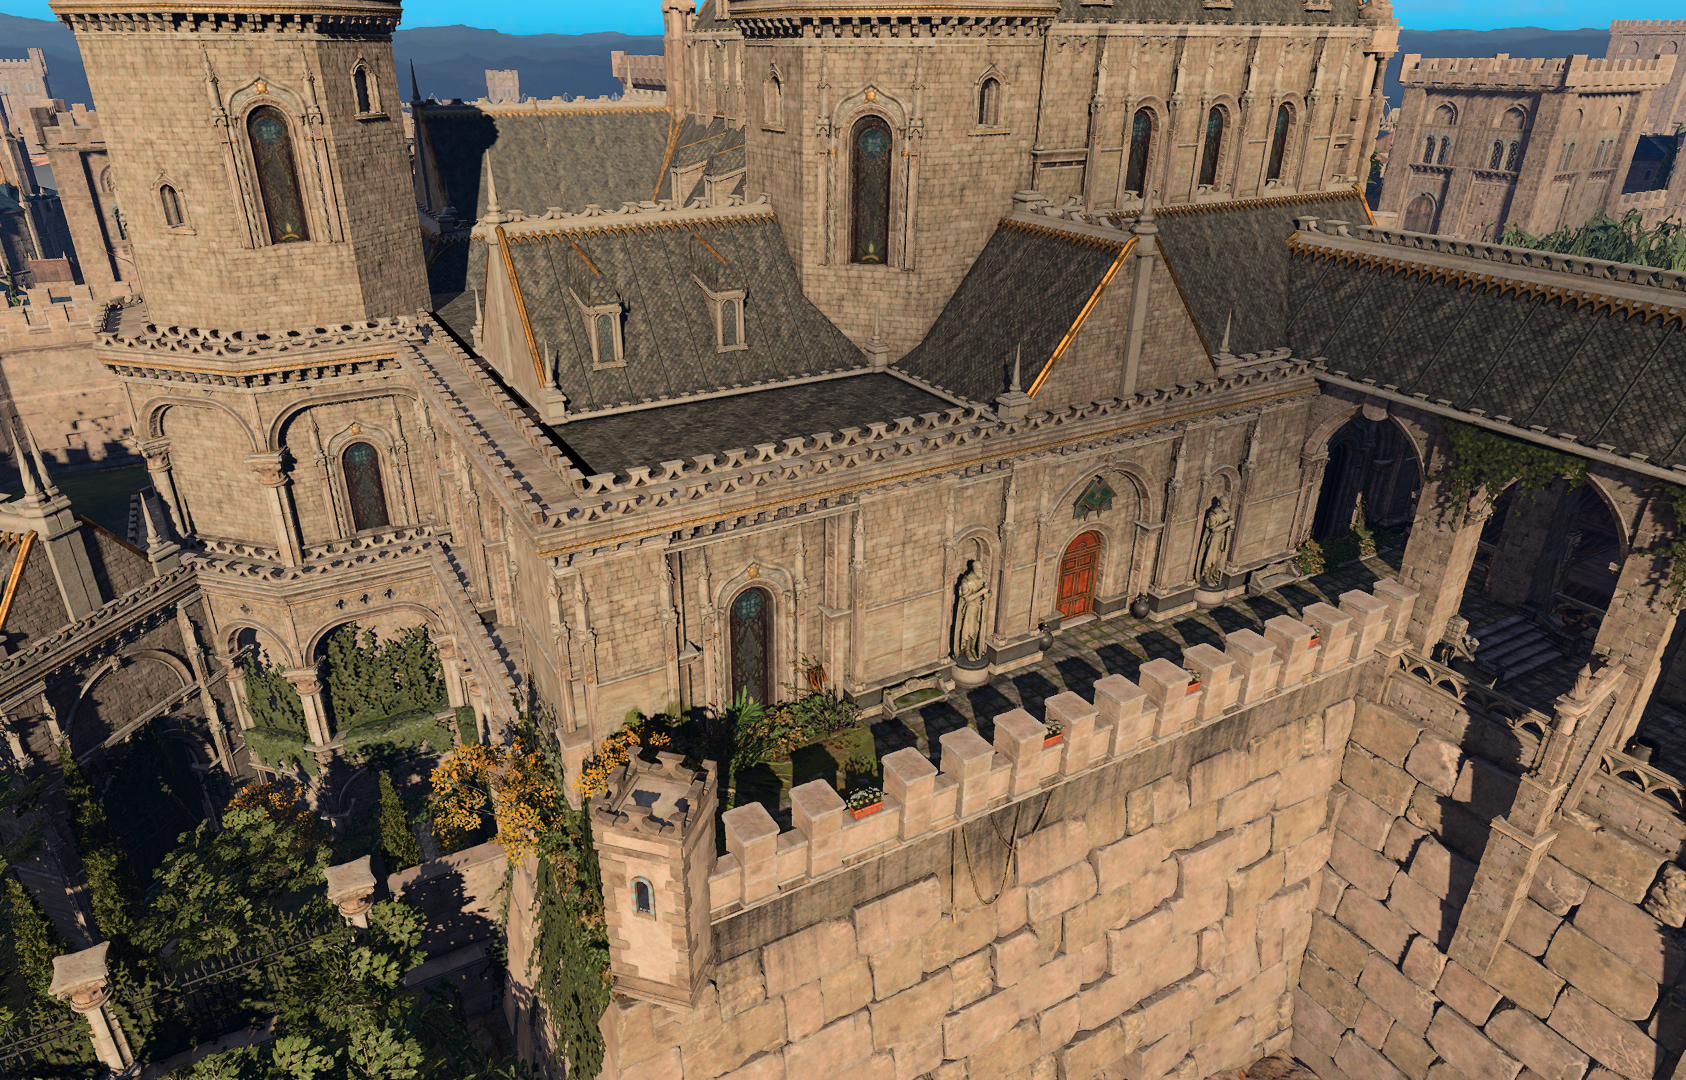
Szarr Palace is a large fortress-like building in the gothic style [1] on the border of the the Upper City and Lower City, built adjacent to the Lower City Central Wall. Its southern ramparts are actually part of the wall.
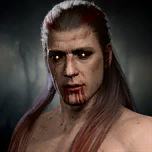
The palace belongs to the Szarr patriar family of Baldur's Gate; it has been in their possession for at least 354 years prior to the game events.[2] By the start of the game, it has been long owned by the master vampire 
Access[edit section | visual editor]
Though the palace probably has other entrances available for visitors and attendants from the Upper City grounds, there are only two ways for the party to enter it:
- From the ramparts, reaching it from the Central Watch Tower (heading north after walking out on the top of the Lower City Central Wall), or jumping onto it from the roof of the Devil's Fee.
- From the Lower City Sewers, using the Gloomy Descend at X: -112 Y: 886 to reach Cazador's Dungeon, and then the elevator to ascend into the palace (see below). This entrance is available only after exploring not only the palace building inside, but also the majority of Cazador's subterranean Dungeon beneath it. It is unlocked from the corresponding door from within, making it largely irrelevant.
The South Tower[edit section | visual editor]

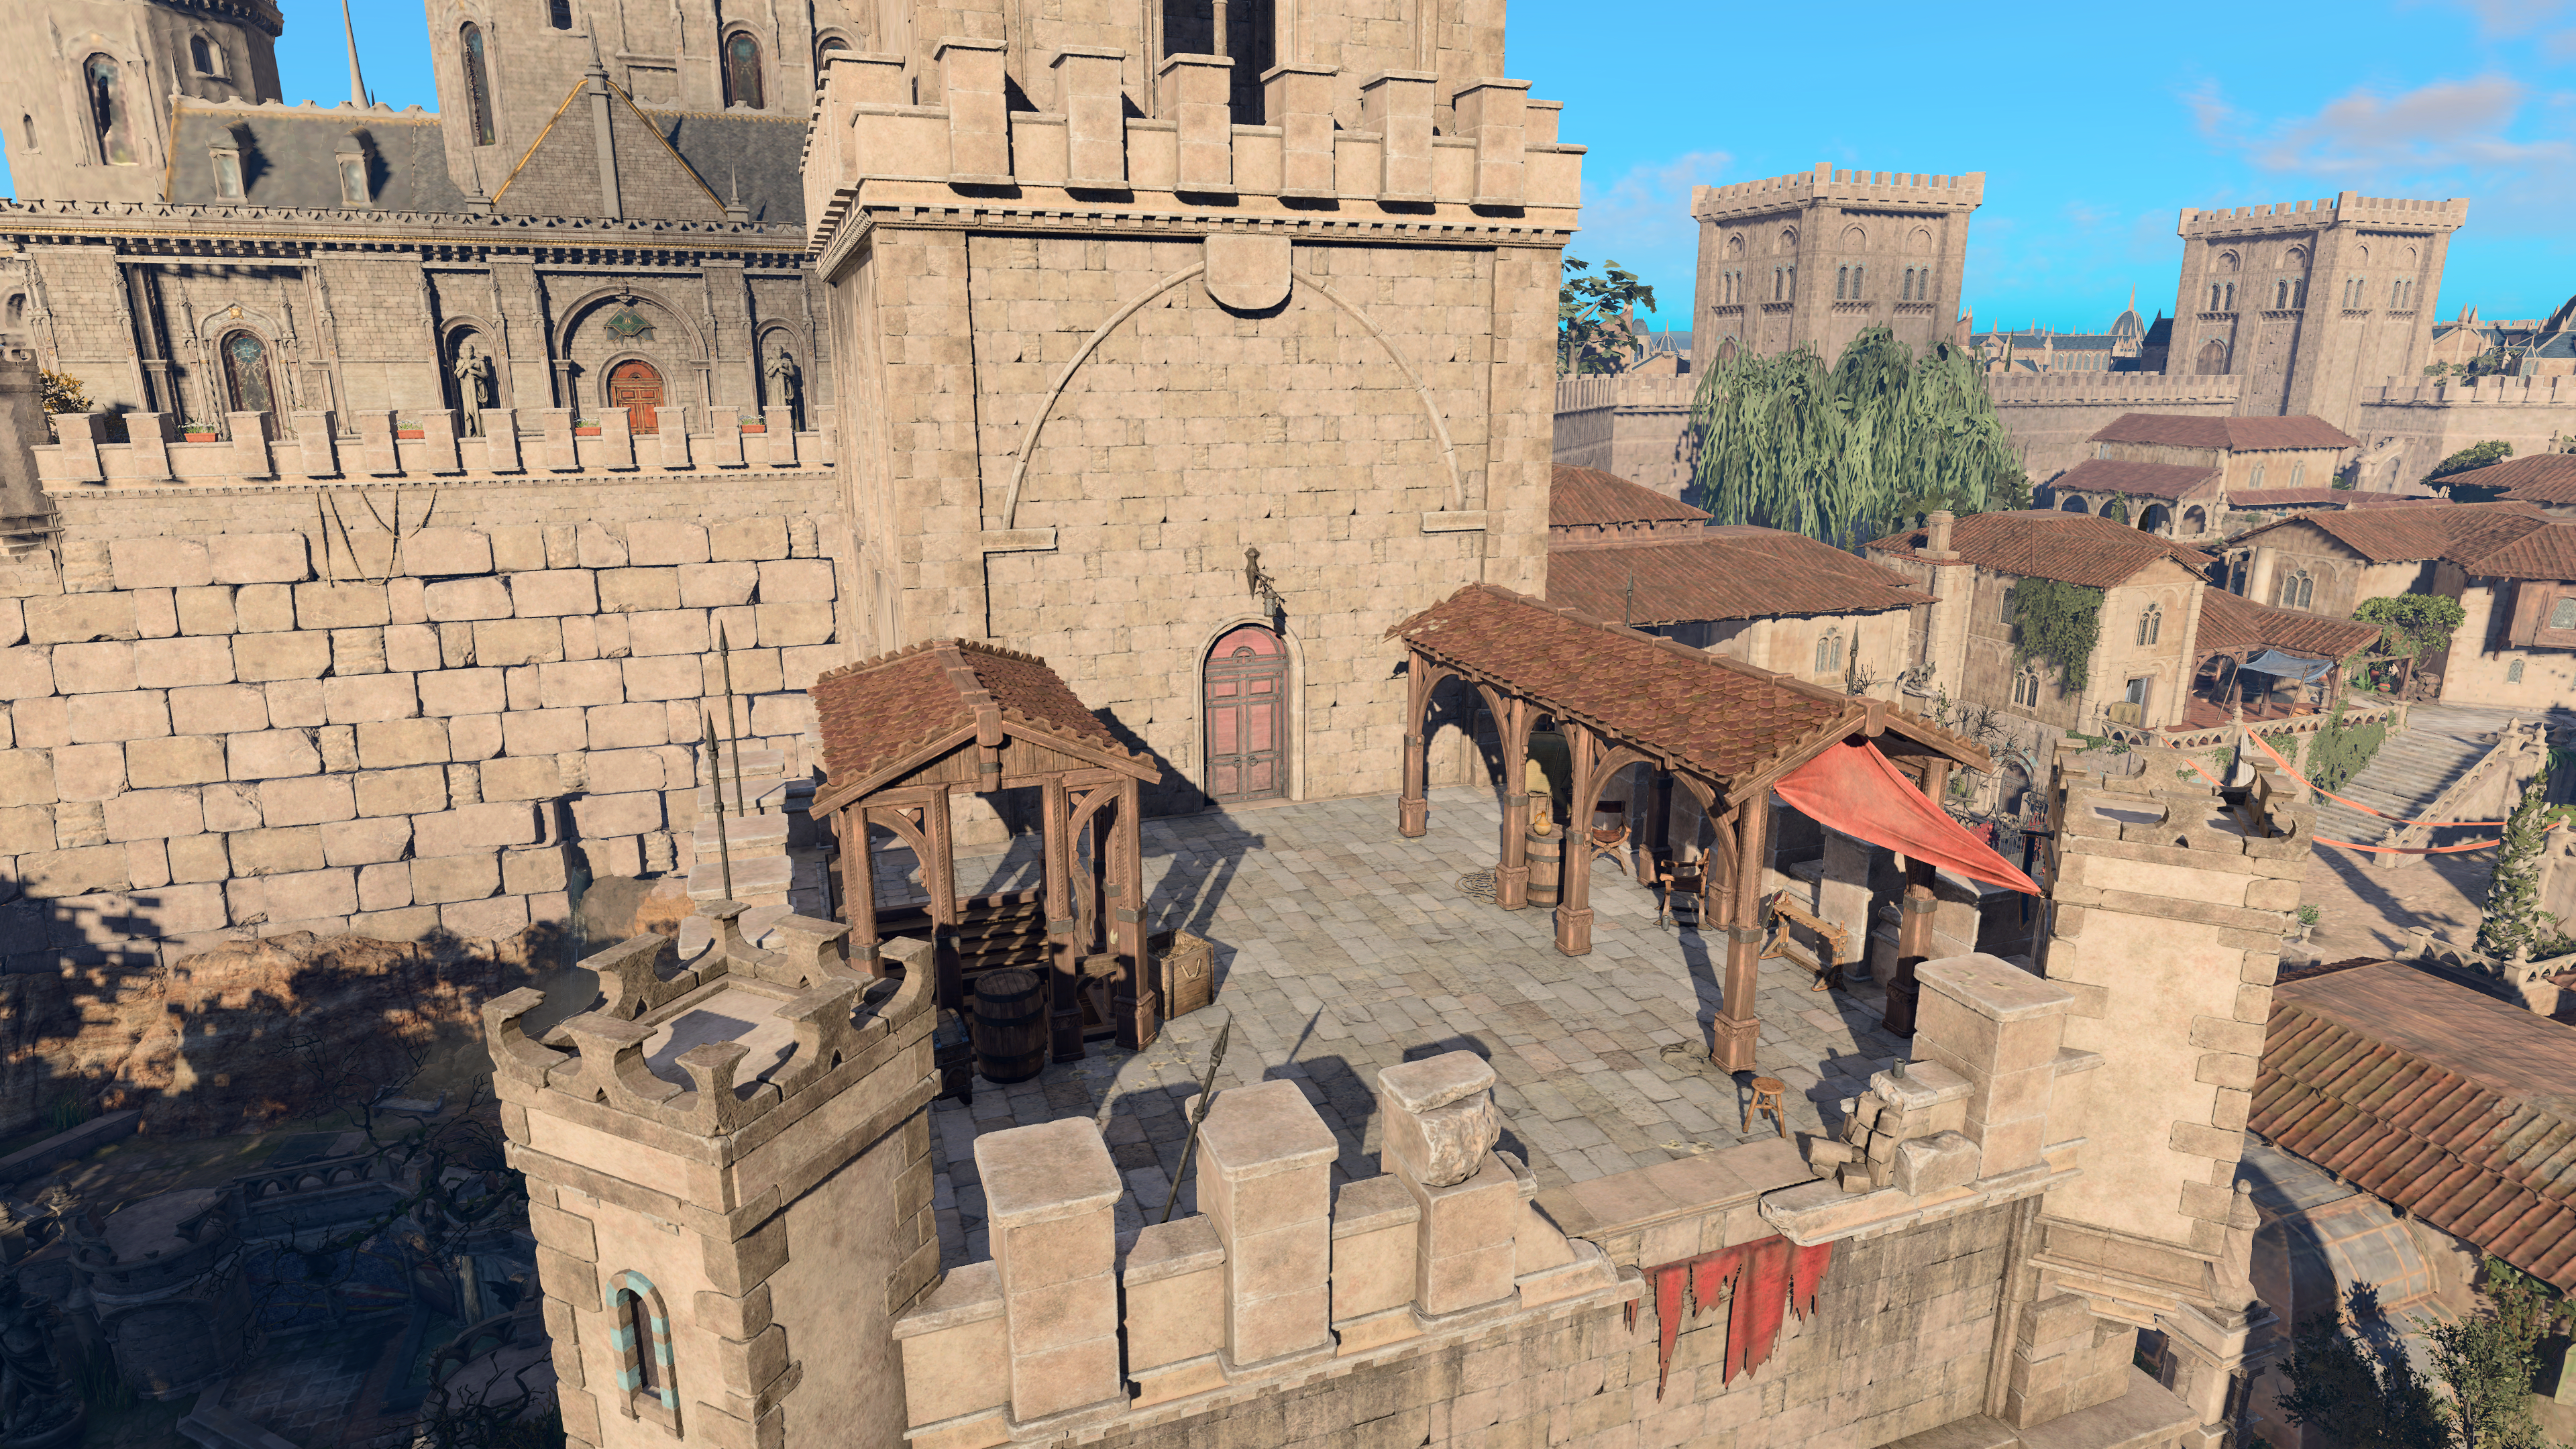
The only initial way to get inside Szarr Palace is its ramparts, accessible through the South Tower: the northern end of the Lower City Central Wall butts into it. The tower has two levels; its ground floor contains little of remark.
The first floor of the tower is secured by guards 


![]()


![]()
![]()
![]()
If spoken with, several
A stairway from the first floor leads up to the top of the tower. An unlocked wooden chest there contains 1 to 3 ![]()
![]()
The guard post can also be bypassed, as the top of the South Tower has a convenient breach in its crenellation right above the entrance door. Spells such as ![]()
![]()
![]()
![]()
![]()
From the top of the South Tower, the party can enter the Upper Tower of the palace. Inside is a locked Traveller's Chest with gold and random very rare scroll inside; it requires either 
![]()
![]()
![]()
Following the stairs up, a door leads to the ramparts – a small outside area which allows the party to enter Szarr Palace proper. The door into the palace is locked and can be opened with the key taken from the guards. Otherwise, it requires a
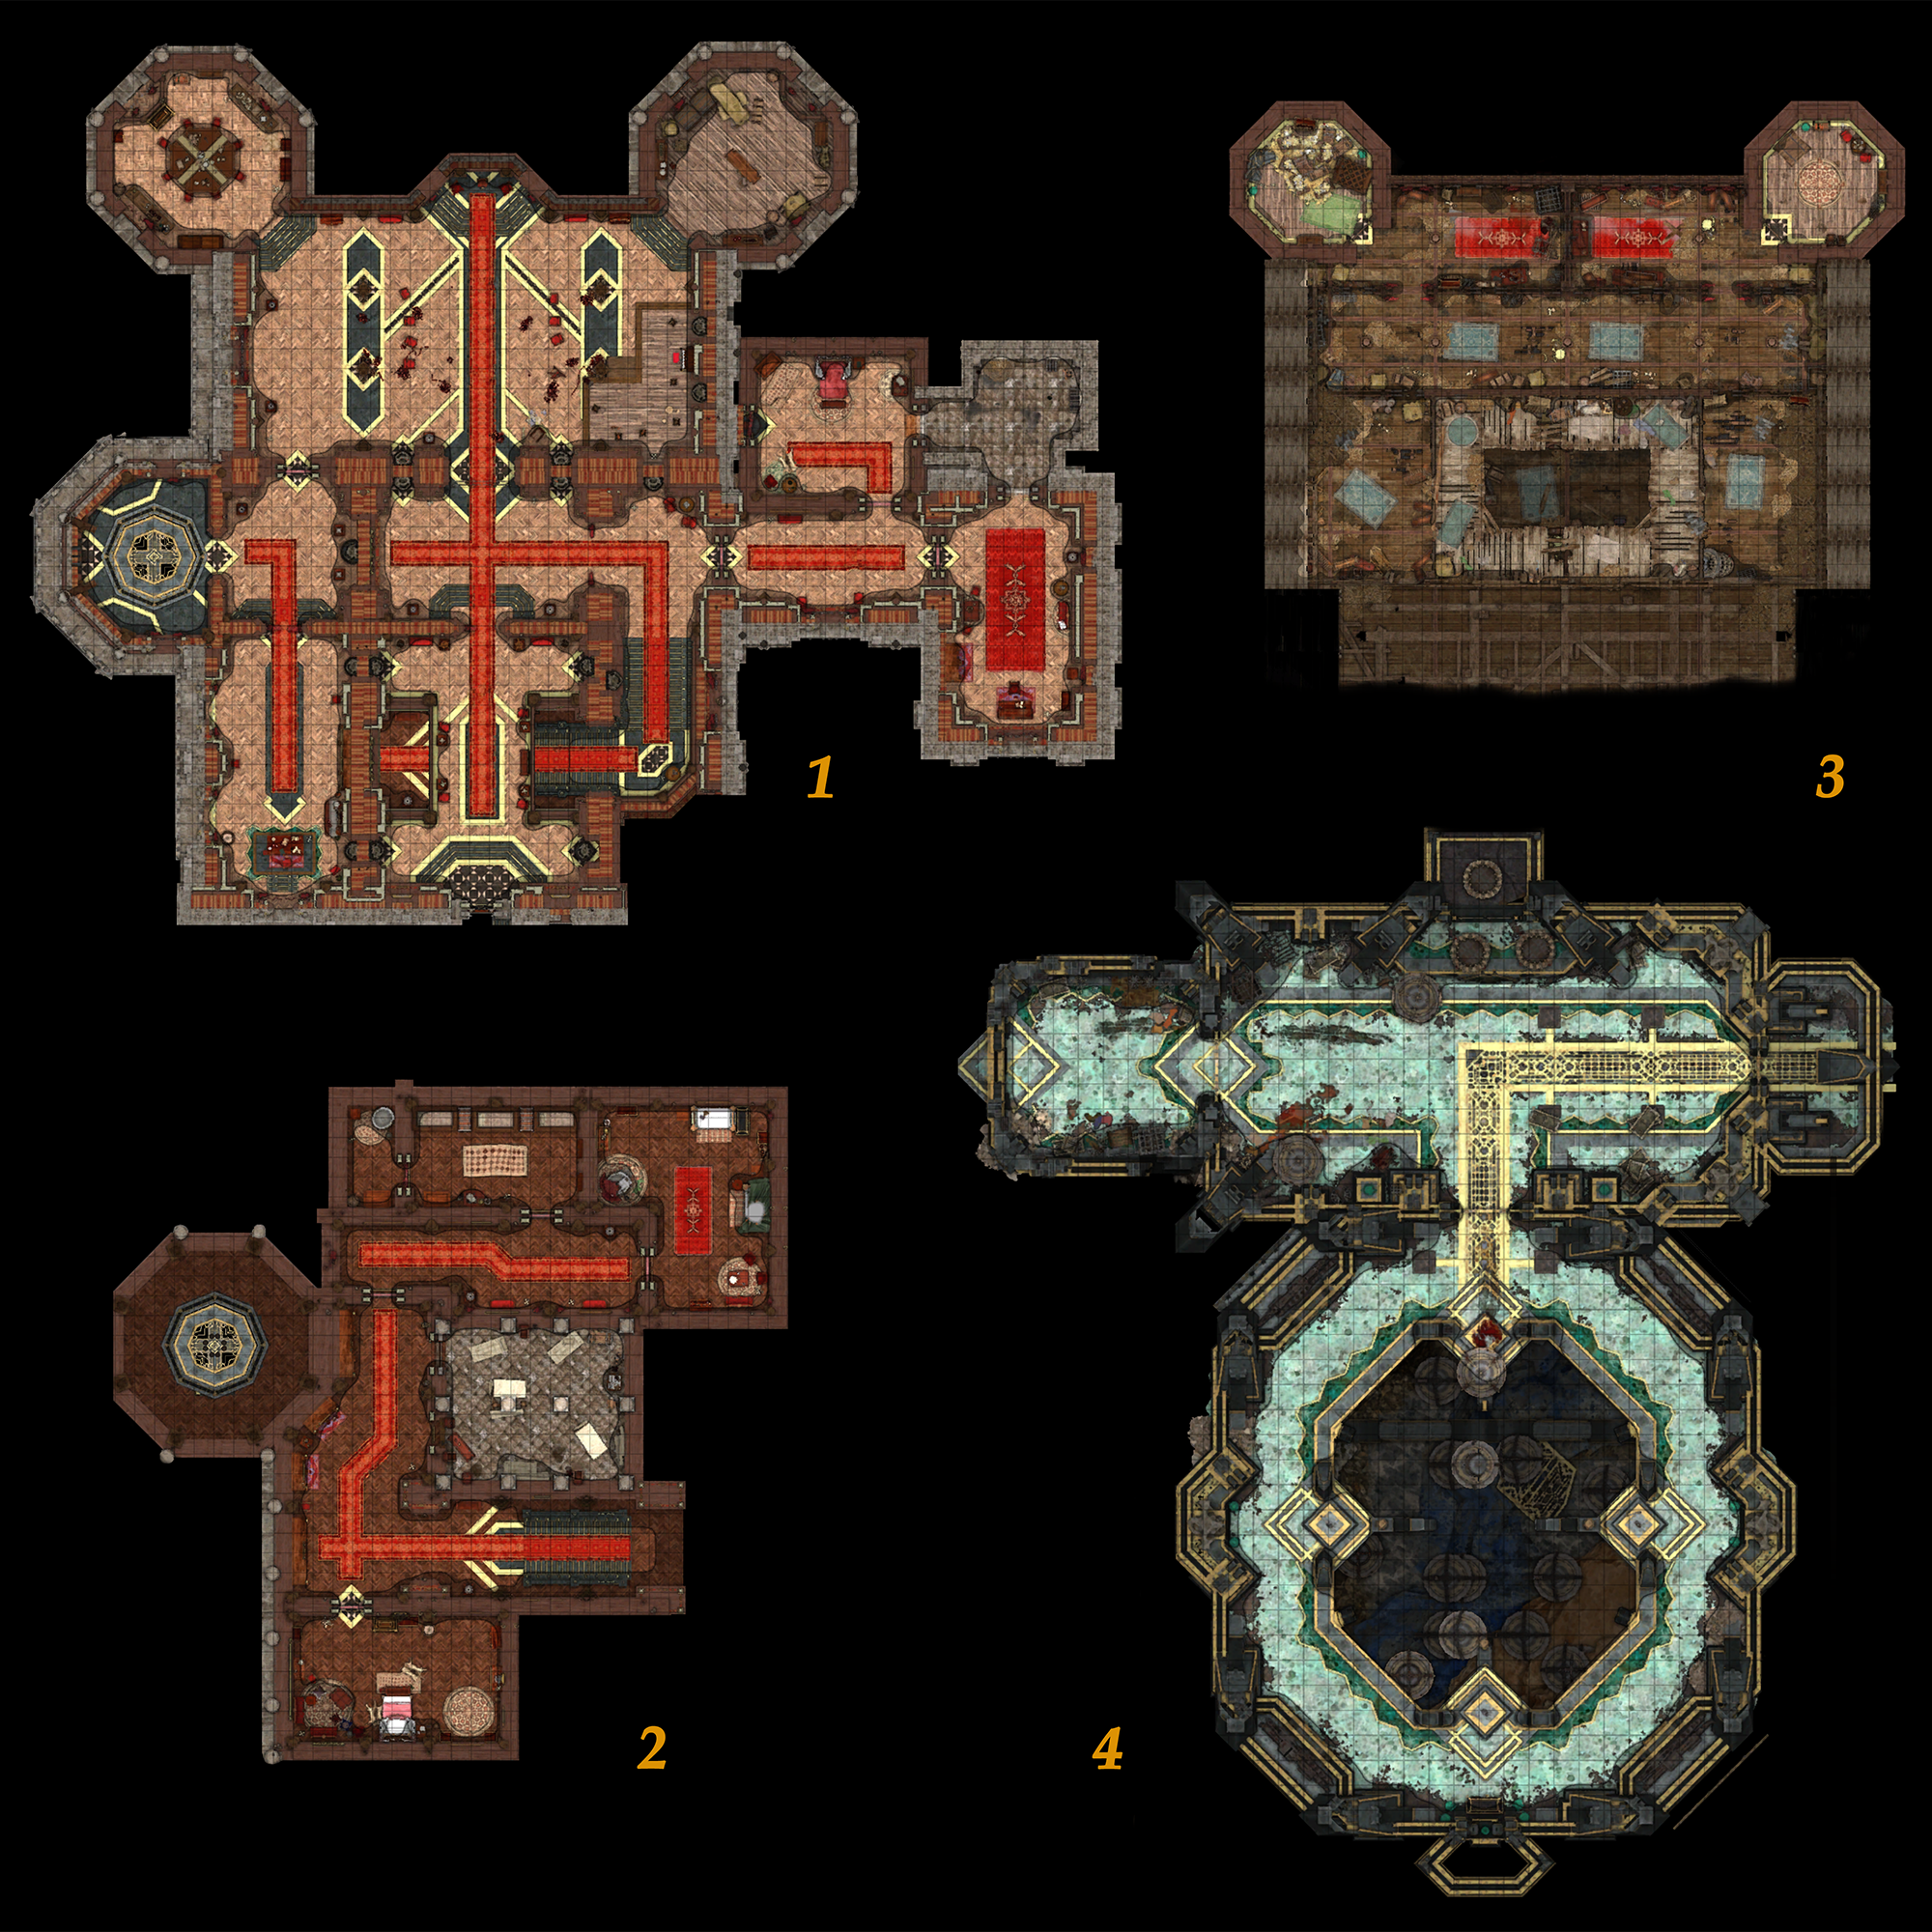
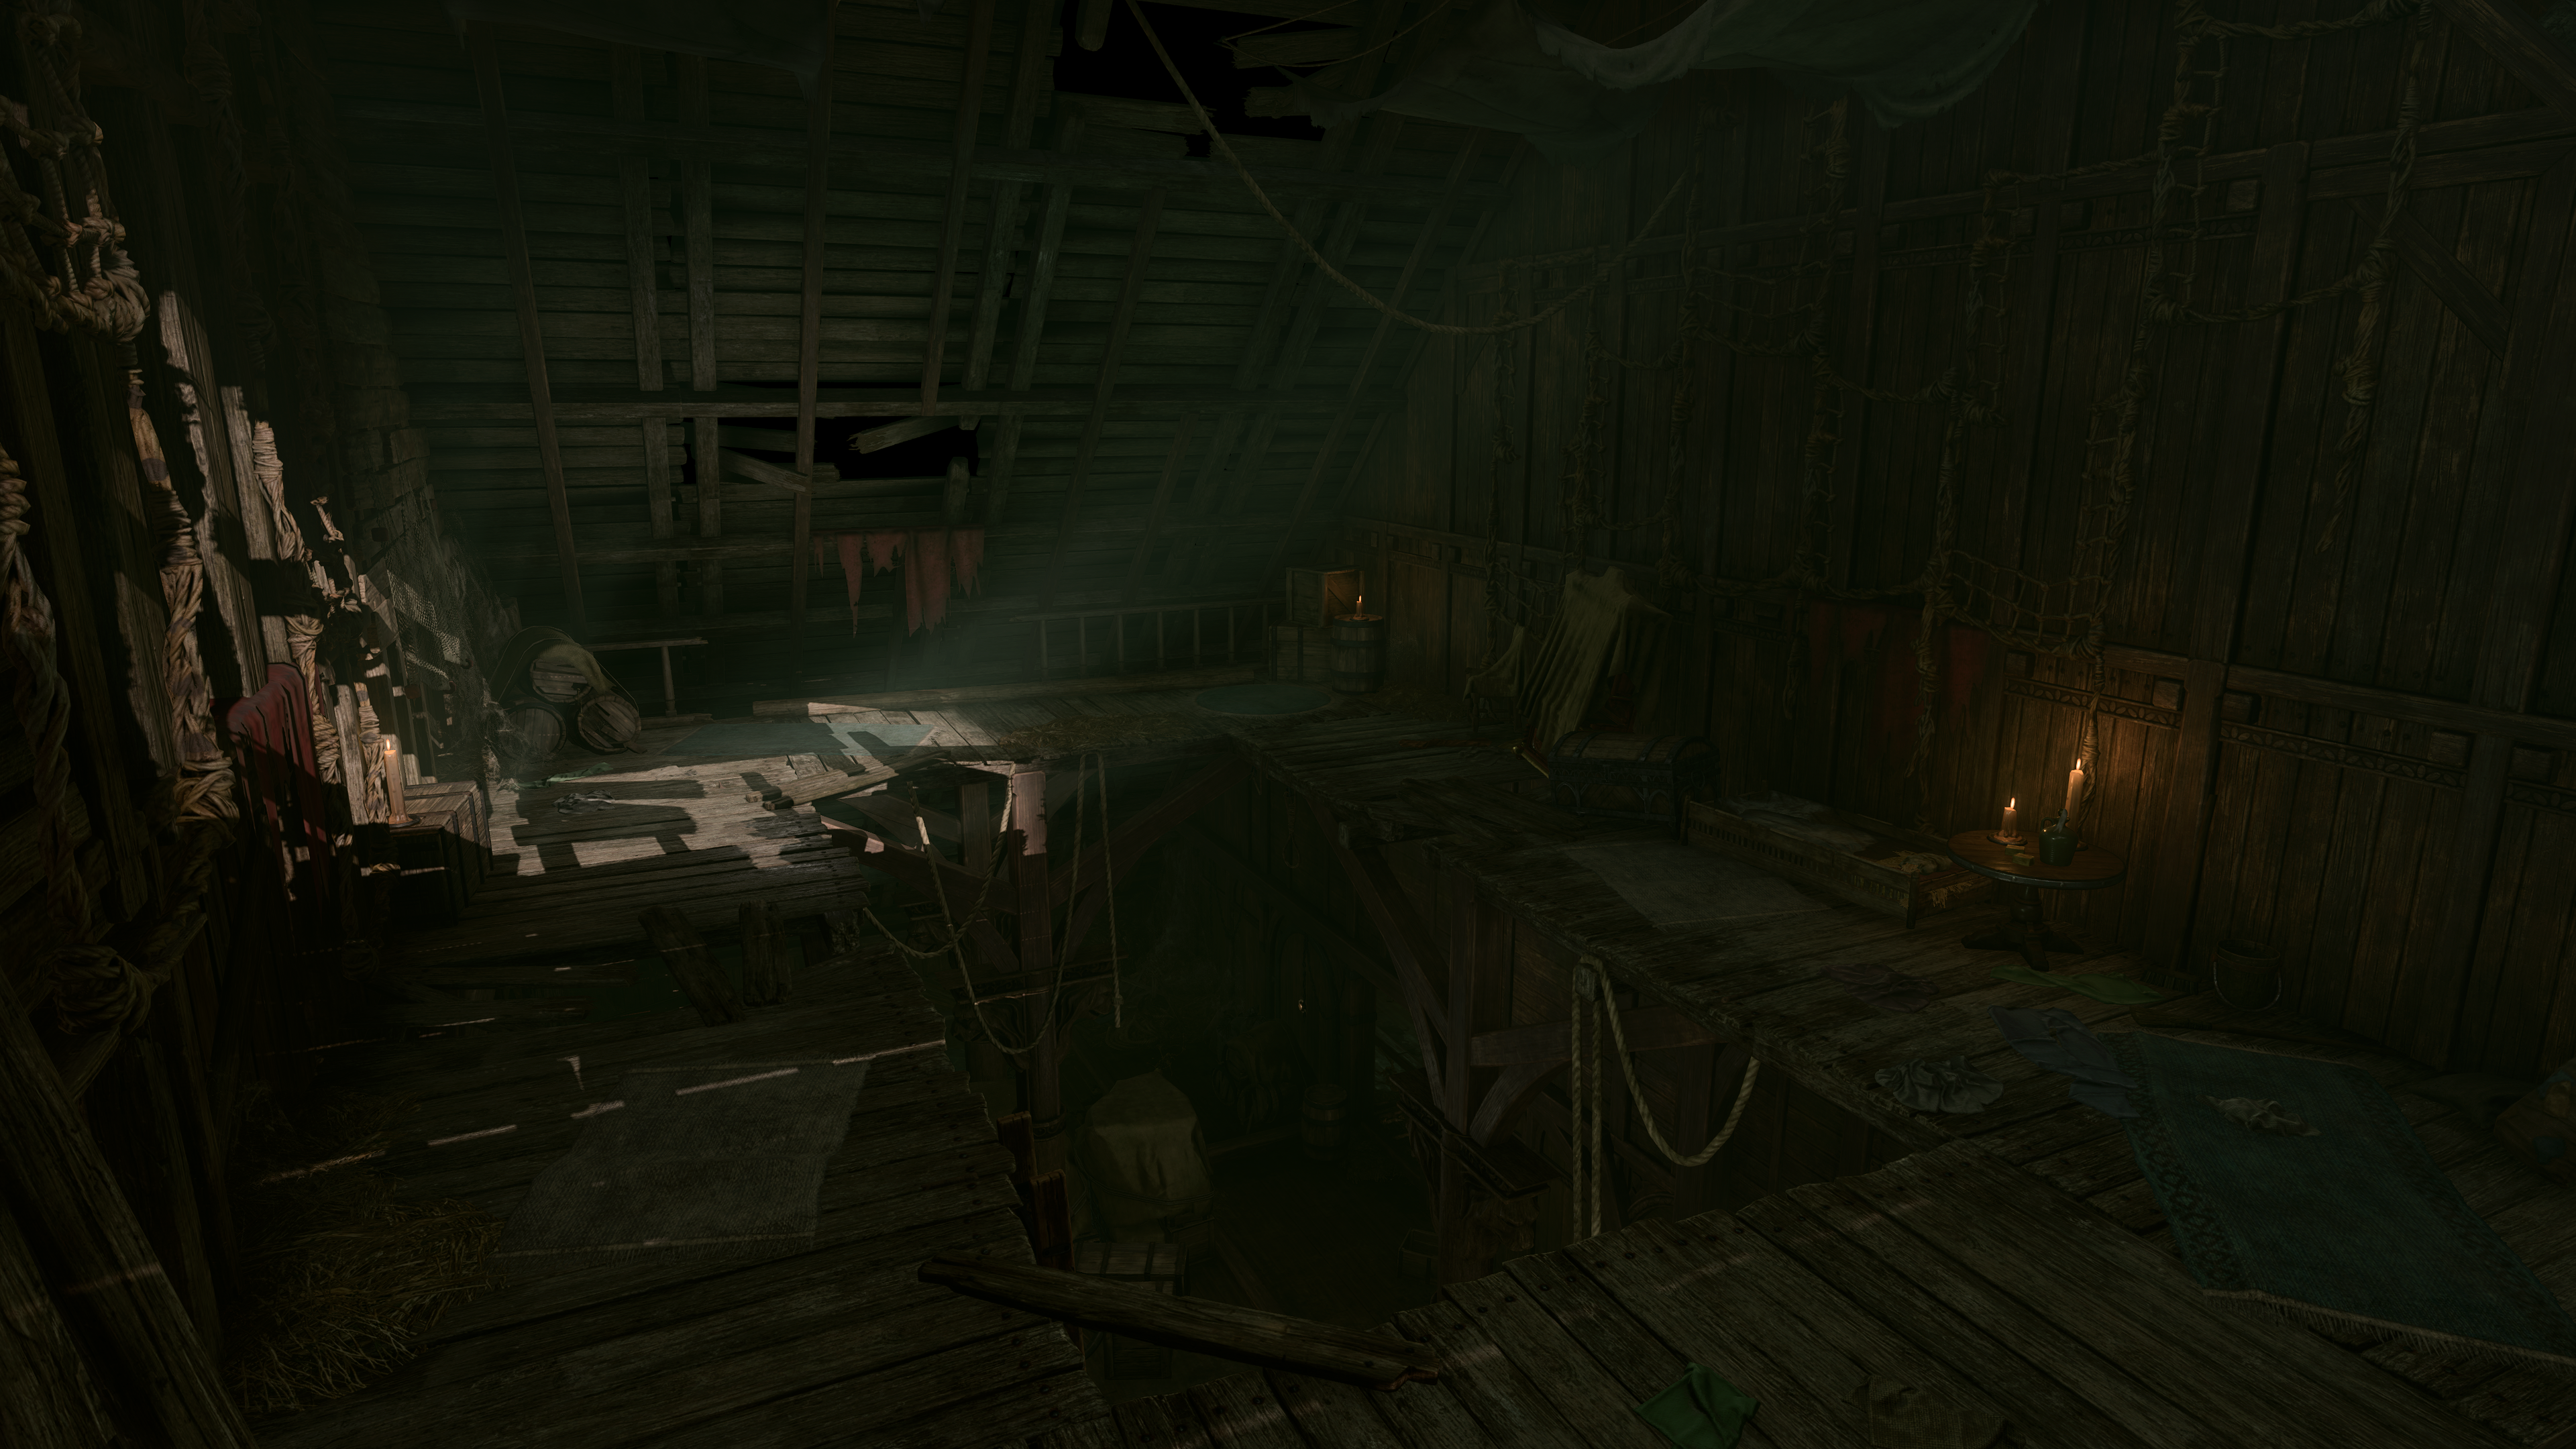
Palace layout[edit section | visual editor]

(1) Upper Floor (2) Lower Floor
(3) Attic with scaffolds (4) Secret subterranean area
The palace has two floors consisting of several rooms and corridors, with the interiors sustained in red and gold colours, matched with dark wood of parquet, doors and archways, and lush mahogany furniture. It is empty save for several servants, wandering about, busy with tidying dirt and stains seen only by them. Talking to the servants reveals little, except 
![]()

Upper Floor[edit section | visual editor]
Behind the curtains directly across from the entrance is an ![]()
![]()
If Astarion is present, he mentions he has never seen the door locked, and also that he has seen other similar writings in the palace. He also relates that he and the other spawn were strictly forbidden from learning this language.
To enter, the party must obtain both the ![]()
![]()
Chamberlain's Suite[edit section | visual editor]
Past the curtain to the east is a small antechamber with the corridor farther eastwards and the stairs down southwards, leading to the lower floor. On a small table here is a bust which can be interacted with. Examining it prompts a narration comment, calling it a portrait of "Mordoc SeLanmere".[4]
Eastwards, at X: -1267 Y: 987 is the Chamberlain's suite, consisting of a locked bedroom and an office, right-angled to each other. If the party have no clues on how to open the ballroom door, a ![]()
![]()
![]()
![]()
In the corner between the two rooms is a secret cubby, which can be accessed through illusory walls (X: -1244 Y: 991 in the office) situated both in the bedroom and office. Accessing the private room from the cubby requires a jump, as the way is partly blocked with a wicker chest. In the cubby is the corpse of a werewolf named 
![]()
![]()
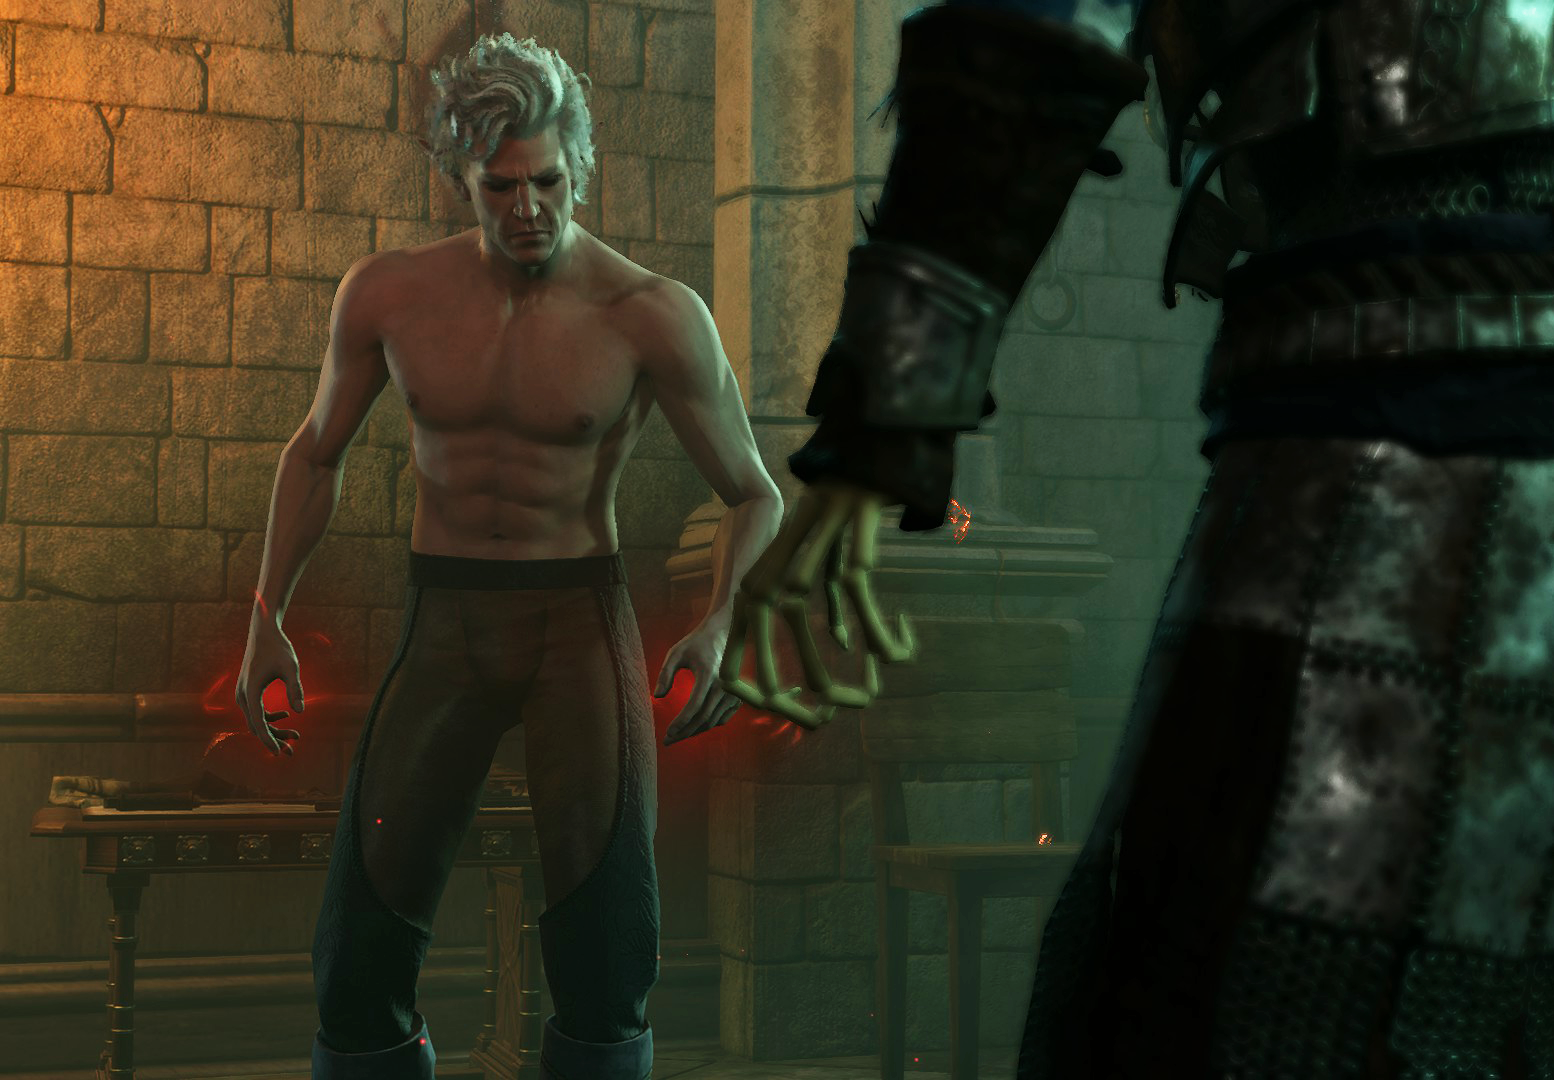
In the private room is a coffin leaned against the wall, with the corpse of 
![]()
Lower Floor[edit section | visual editor]

The lower floor of the Palace is called the "vampire spawn level". It consists of several rooms dedicated for the dwelling of Cazador's brood. The level consists of the salon, the dormitories, and a concealed room called "the Kennel".
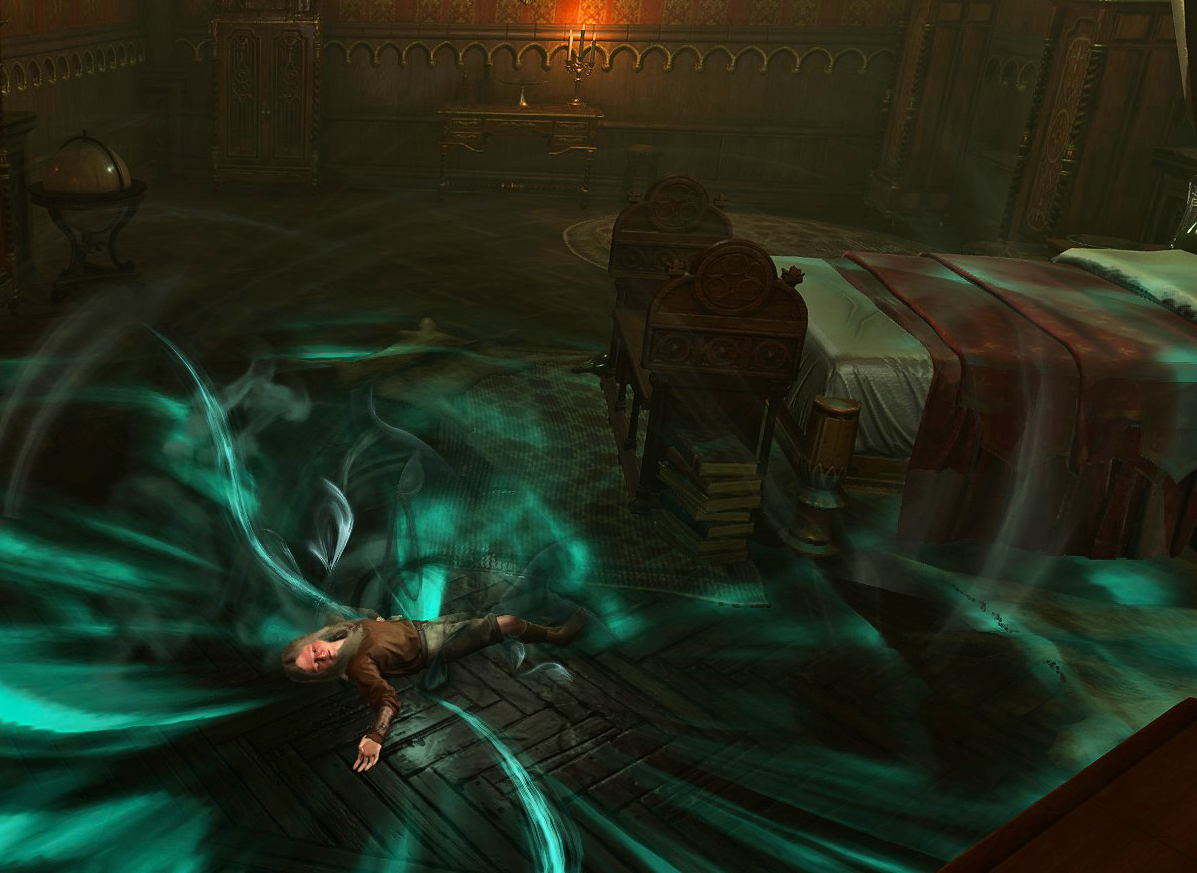
The salon is the first room along the corridor, after descending the stairs. When the party approach, ![]()
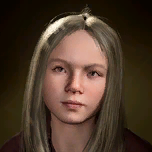
If the party choose to enter the room, turn-based mode automatically begins. In the middle of the room lies the cursed corpse of the young girl 
![]()
![]()
![]()
![]()
![]()
In the rosewood desk here lies the diary of another Cazador's spawn, 
Moving or picking up Victoria's body makes those servants who notice it temporarily hostile. Unlike similar situations with other characters (for example, city guards), there is no option for the party to talk themselves out.
A locked opulent chest in this room (requires ![]()
To the north of the salon is the dormitory wing. Two wooden chests between bunk beds in the common dormitory contain gold and another spawn's ![]()
![]()

At X: -1293 Y: 986 is a hidden door to the Kennel. It requires a passive
Inside is the skeleton ![]()
![]()
![]()
The wooden chest in the Kennel contains random minor loot.
Ballroom[edit section | visual editor]

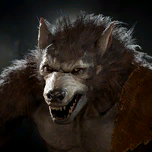
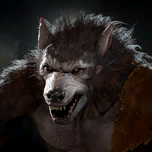
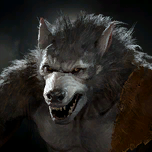
After obtaining the signet ring and reading the Kozakuran dictionary, the party can unlock the Sinister Door and enter the ballroom, which is guarded by three werewolves: 


The ballroom features the traces of a massacre – pools of blood and broken or turned over furniture. Several corpses named "Party Guest" are strewn about, one of which can be communed with using ![]()
When the party enter the ballroom, one of werewolves starts a dialogue. Regardless of options the party choose, they cannot be reasoned with, are always hostile and ultimately start a fight. If any of palace servants come close to the ballroom after the battle starts, they join in against the party.
Three rooms are connected to this ballroom: two alcoves in the northeast and northwest corners, and Cazador's office in the southeast corner. The first two rooms each contain a button which seals off that room with a movable wall and opens the other one; these walls cannot be destroyed. While splitting the party or using summons can be useful, it is not necessary, as the areas to which each of the side rooms lead have no enemies.
The northeast alcove is a storage featuring a ladder to the attic, while the northwest one is a dining room with a hidden hatch to the subterranean puzzle area.
Attic[edit section | visual editor]

The attic is accessible through a ladder in the northeastern side alcove of the ballroom at X: -1262 Y: 1019. It consists of several rooms which are opened with buttons on the walls. The rooms are 'decorated' with crates, coffins and coffin lids, and other similar discarded items, as well as iron cages, torture racks, skeletons and stacks of hay.
The attic contains several lore-related diaries by 
There are several points of interest here:
- The room in the north-western corner of the attic, which can be opened by pressing twice the button at X: -750 Y: 1079. Inside is a pile of treasure chests with gold and valuables, and the

- The farmost part of the attic, where another ladder leads up to the scaffolds. On the scaffold at X: -737 Y: 1062 is a wooden chest. It contains a pouch with a

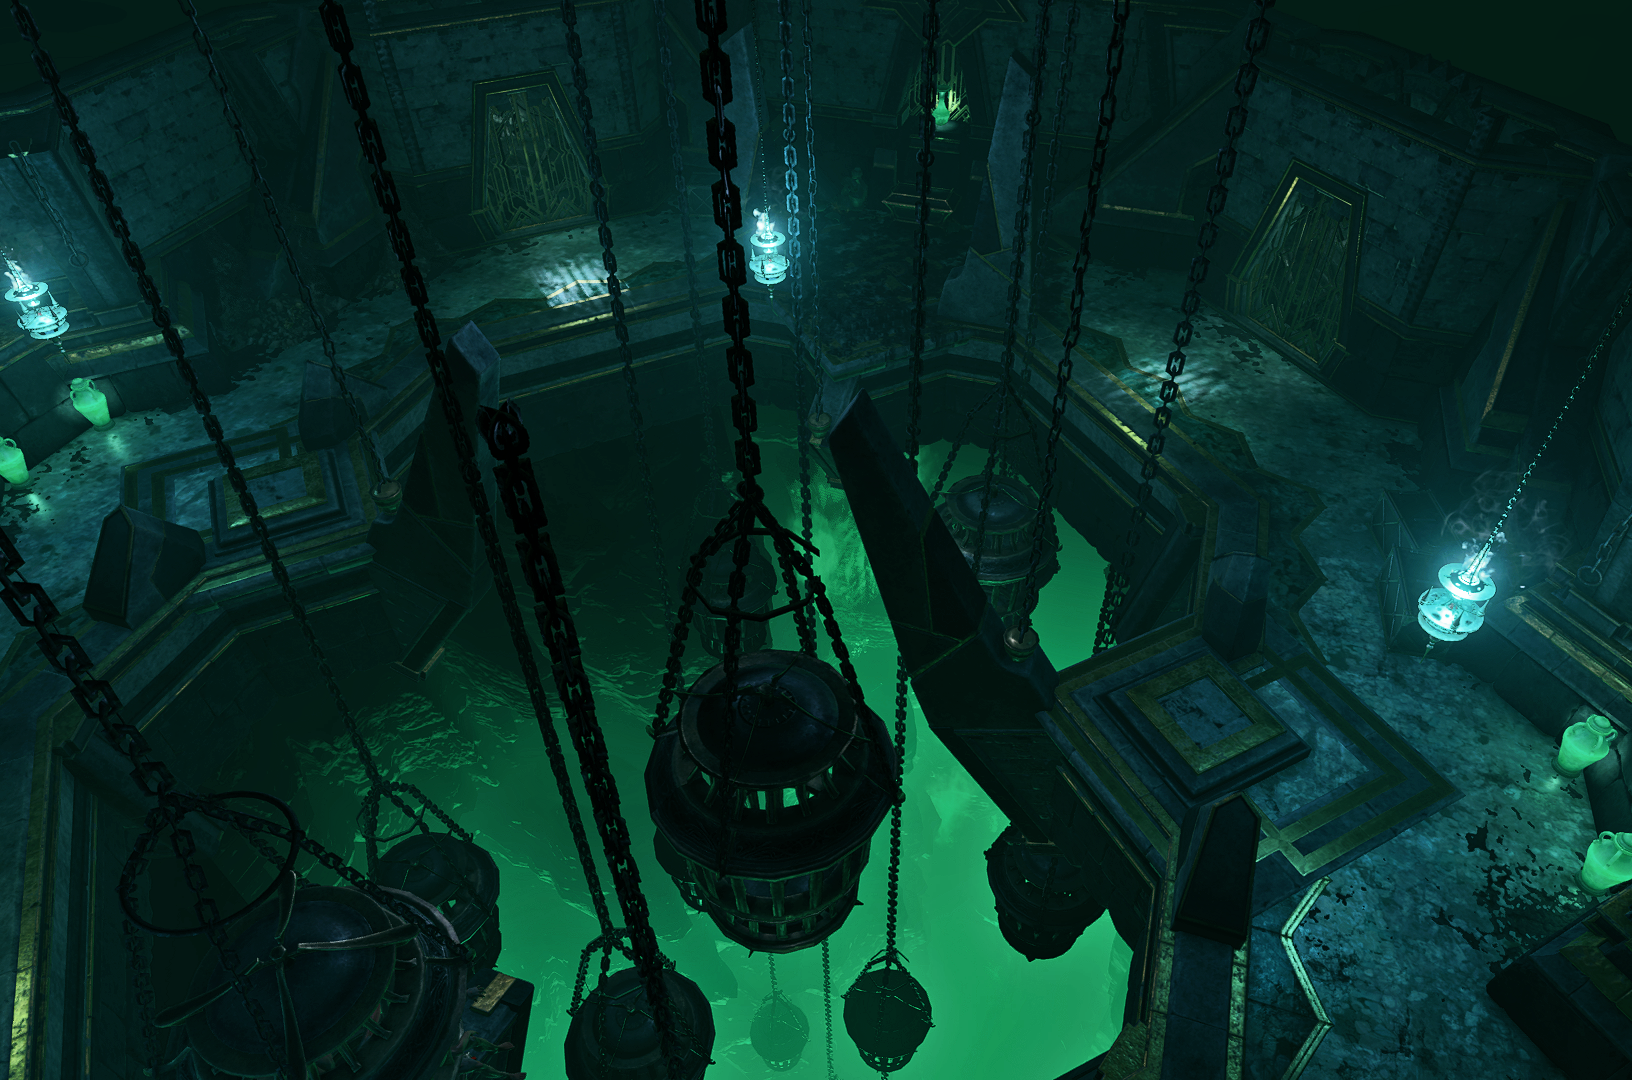
Subterranean puzzle area[edit section | visual editor]

This secret area is accessed through the dining room in the northwestern corner of the ballroom. In the opulent chest at X: -1308 Y: 1020 is the ![]()
![]()
After descending[7] the party find themselves into a room with locked door, which opens after placing items on the two pressure plates.[8]
The following rooms have four more pressure plates tied to the two vents with ![]()
![]()
Once all four pressure plates are pressed, the trap deactivates, and the door to the south opens, while the door behind the party closes. To get out of this area, any single crate must be removed from the pressure plates (this reactivates the trap if not previously disarmed). However, any of the two doors can be lockpicked with the
At the far end of the second room is a locked opulent chest (requires
Cazador's office[edit section | visual editor]
At the southwestern corner of the ballroom X: -1298 Y: 995 is the Office Hall. Inside at X: -1305 Y: 987 is a interactable dais which is revealed to be an elevator.[9] It brings the party to ![]()
The office itself has few items of remark. Across the dais is another interactable bust depicting 
Companion interactions[edit section | visual editor]
Szarr Palace is the focal point of

If Astarion is present, several interactions with the NPCs inside the palace also differ:
- If Astarion is the one to initiate the conversation with

- The key to the ramparts is only needed if Astarion is not present. If he is, the door into the palace proper unlocks by itself upon approaching, and Astarion comments on this with irony.
- Talking with

- In the Kennel, when speaking with

Also, the Kennel is the location where Astarion finds himself if he was downed and kidnapped during his "siblings'" assault on the party's camp. This scene is identical regardless of Astarion is played as an Origin or recruited as a companion. Throughout it, Godey tries to subdue Astarion, projecting Cazador's willpower on him. Astarion has a chance to break off the magical shackles himself, passing one of
Related locations[edit section | visual editor]
Related quests[edit section | visual editor]
Characters[edit section | visual editor]
Inhabitants and servants[edit section | visual editor]


Party guests[edit section | visual editor]
Only named characters (or those whose names can be learned) are listed here.


Werewolves[edit section | visual editor]


Creatures[edit section | visual editor]


Loot[edit section | visual editor]


- Many mahogany wardrobes in various rooms of the palace contain random sets of Camp Clothing from Rich to Aristocrat grade, which can be looted without any consequences.
Related literature[edit section | visual editor]


Diaries of Amanita Szarr[edit section | visual editor]
Amanita's diaries are placed here in their chronological order, instead of ABC order used in other similar article sections.
Notes and references[edit section | visual editor]
- ↑ "That giant gothic monstrosity has been inhabited by vampires this whole time?" - a Baldurian character, talking with Astarion about Cazador Szarr's social standing in Baldur's Gate. Source:
Astarion_InParty2_Nested_JourneyToCazador.html. - ↑ The scroll

- ↑ Kozakura is an archipelago in the far eastern part of the Forgotten Realms, with history, nature and culture partly mirroring Japanese. Cazador Szarr's facial features may be a reference to appearance characteristics not uncommon to many peoples of the Far East.
- ↑ Mordoc SeLanmere was the main antagonist in Dark Alliance 2, the vampire lord also known as "The Pale Knight". See also

- ↑ Upon reading the dictionary the interacting party member utters a comment. This comment differs depending on whether the signet ring has already been obtained, and also on whether any party member succeeded the History check when first interacting with the ballroom door.
- ↑ Prior to Patch 5 it was possible to cast

- ↑ Despite having a level decoration similar to Cazador's Dungeon, this area has a separate map and is not connected to the main dungeon.
- ↑ Prior to Patch 5, the secret area used to have a puzzle with levers and was impossible to solve. This was changed later by removing the levers and implementing a series of pressure plates. The patch notes to Patch 5 contain a line which likely refer to this: "Fixed the puzzle in Cazador's Palace."
- ↑ The elevator is also seen on the Lower floor map, but cannot be reached from there.